Monday, 21 September 2020

Armoured vehicle "prototype"

The development of the DSM-720 AFV.....

"Here are some parts", says WillB as he presented me with the remnants of his model building of 1:56 vehicles.  "Tracks of a half-track option I didn't use, some miscellanous bits and pieces, and the double turret of the Russian early war t-26.  Have fun and lets see what you come up with....."

No particular engineering plan.  Rivet-counters might cringe...

I did buy a package of various thicknesses of styrene sheets and had some thin 'L' angle.  The latter I indented with a sharp tool so to look like the existing rivets in seen on the turrets.   The rest is just what I could get off the sprues except for the 'engine top' which is a chunk of 'supports' I kept from the 3D models awhile back.  


While I did suggest no particular engineering plan I did think of some of the ergonomics of the design.  The machine gunners would be standing,  all the better to be able to spin around,  and with the driver seated tightly between for example.  As the two turrets are directly from the historical t-26 I need not justify that arrangement. 😏

The angled 'iron' plates at the front were added as "initial tests showed additional armour was required from direct rifle fire and the angle of the armour plates increased protection. The angled plates also will assist with incline maneuvering." { actually I thought the model looked kinda like silly box....so I altered the look of it }
 The 'report' further states "the weight of the added frontal armour is countered by the attached cooking stove having three separate lids for each of the crew to boil meals at the same time using the heat of recent engine heat."  { Don't have a clue what the original part was but explains this bit of addition }


As usual I made this fictional AFV  just for the creative exercise. 

Thursday, 17 September 2020

a 'Gain the Hay' Campaign engagement

…despite two small ‘victories’ against the French in the previous 'few hours of this campaign' played out using the Osprey "Rebels and Patriots" by WillB as the French CO,  the Nassau forces (historically a small German state adding its military force to Wellington’s Allied Army in 1815)  had decided to fall back to this picked second position defensive hedge position beside a small woods to protect the hay of the nearby field from French use…


The French dismounted cavalry advance against the Nassau defensive line along the hedge. The Nassau Lights are in the woods off-camera to the right.   The hay stacks can be seen in the distance. 


The French...well, me actually...decided on the direct approach, to forego any firing as their carbines were less effective and not having the range of the Germans and their muskets, and lead with his two weakened dragoon companies; with the under-strength Elites - from previous casualties- on the right to face the Nassau Lights ensconced in the woods;  and the 'foot' cuirassiers positioned close to the rear to be the ultimate fighting force to penetrate the Nassau line at the hedge.
The assault goes in

The cuirassiers are in morale trouble indicated by the heavier strapped knapsack marker indicating permanent negative modifier and the plainer knapsack of a second negative.

His elites were met with strong musket fire and quickly put hors-de-combat.  The other French units advancing until, as a body, they all halted. (for all three units I failed their activations); however, the German musket fire was very ineffectual during this time (my 36 dice with no hits at all!). 

 While the dragoons finally took the low hedge, the Nassau 3rd Line Company calmly and without disorder, put a volley into the poor dragoons, all but destroying them. The remaining French were forced to concede due to casualties sustained overall, and had to withdraw.  

Their horses will not dine on the hay tonight.

Monday, 14 September 2020

Foot Cuirassiers

 No big write up. Just a test of the new Blogger interface....

My French Napoleonic dismounted cuirassiers - converted from Perrys plastic offerings of the dismounted poses from their Dragoon box set. A photo shot of the foot cuirassiers, most of whom are without their heavy armour. 


Saturday, 12 September 2020

1815 cavalry photos

Some shots of my cavalry from the 100 Days/Waterloo Campaign


All are plastic Perrys [with the exception of the Dutch horses which are Fireforge medievals] and with the Dutch and Belgians heavily converted by me.

Trying to come to terms with the new Blogger interface.  However I did discover new edit tool which allows type directly on the photo.  Very old, but new to me ...I am still a Luddite I must admit.   

Sunday, 6 September 2020

Losing My Head(s)

a quick retelling of the head(less) unit of plastics… 1. I had 9 Perry Napoleonic French plastics as a unit ready to paint primed in black….but then I tweaked to the Portuguese Legion in Russia used a version of the Bardin lapel and had crossbelts for all members AND were in the unique brown uniform. Cool! .....so off with their heads and new ones glued on.... 2. But I already have the Portuguese well represented in my big-battle army, and they were only in Russia and if mounted as a skirmish scale unit, does not solve my need for an opposition for the dismounted dragoons. Looking at the picture books of uniforms, I spot the Neapolitans. How about representing the “elite” unit to be beside my existing Neap. Lights in the big-battle collection? Excellent. ....so off with their heads….and new ones glued on...... 3. Whoops, further research shows that they did not wear the shako with cords - the selection I had glued on. ....so off with their heads.... [the French guillotine didn't chop off this many heads, did it?] 4. The Neapolitan heads are now with covered shakos - so I didn't need to depict their shield shaped badge! I even did a color list for this unit. But then I saw an illustration of the Nassauers at Waterloo. My mind raced. If I used the ones I have already have for the big-battle games, re-basing them and adding these nine, I could get a decent number to make a “Rebels and Patriots” force and face them against my dismounted dragoons! .......so, yes, off with their heads, once again........ 5. But hold on, the numbers don't quite work. I am missing one to make a complete unit. Darn. However, I thought, I do need a commander and the opposing French commander is mounted. So, find a spare mounted figure. Luckily I had been gifted a sprue of Warlord British heavies. With no small amount of scraping, a new pistol carrying arm and a new hussar fur-cap wearing head leader. I had my unit done so no more removing of heads and this time I actually painted the buggers. The photo shows the Nassauer grenadiers with the new figures blended in.
Does anyone else do this or do you plan everything in advance? {smile} -------------------- Edit note: as Blogger has changed its interface and I am having technical difficulties trying to understand how to do what new to do [I am currently using the limited time 'old school version' which is why it reads so bad] I may end up quitting on this blogging thing. If I do, I hope you have enjoyed my personal recording of the recollections of my wargame activities.

Solo WaT in Japan

I had only a few full torso WW2 Japanese infantry left on the sprues and since a few weeks ago now I was still on the “What a Tanker” infantry anti-tank theme, I thought I use them to create essentially a suicide AT squad armed with some ‘lunge mines’ supplied. Two of them have those weapons on a long stick, one has his in the hand (I used the pole elsewhere!) and the fourth is using a rifle to keep the tank commander ‘buttoned-up’ making it harder for the target tank to see these infantry threats. So to explain these new Japanese warriors AND, more critically, the use of an old British Matilda tank, AND further, to show off my new Japanese Plasticraft building, I have this Alt-History story: April 1946, U.S. President Truman was not delivered the atomic bomb and so had to defeat the still defiant Japan the old fashion way. Operation Coronet is almost two months old with Tokyo and adjacent areas secured but pockets of resistance needed to be removed. While a relatively small part of this operation, the Australian contribution was tasked toward one of these areas. Sergeant Forlorn’s old Matilda tank had become separated from its infantry support and had entered a small village seemingly untouched by the destruction of war…. Inside the Matty stopped before the village, a conversation rages: “Where are the bloomin’ infantry?!” “lost them back a ways” “Why didn’t you bloody say?!” “you seemed happy looking at the cherry blossoms” “Well, step on it and get past this bloody village!”
The engine of the Matty sputtered and then roared to life (rolling doubled ones for first Move Dice followed by rolling 10 inches for the Second!). Hearing the tank, Ieko sprang from his position behind the house’s corner while yelling “For the Emperor!”, slipped on the wet ground [I only rolling 3(inches) with 2d6] yet reached the tank and aimed his thrust with the mine held in his hand to the side of the green monster.
His aim (double sixes! …my rather erratic and dramatic dice rolling trend continues…) adds 2 more Strike Dice to his attack.
“Its a Kamikaze!” is all the C.O. who was in the open hatch could say before the sharpshooter with the rifle put a bullet into his head. [ I must say my rolling of the dice in this case was perfect for this event to occur] The Matty is now down to three Command Dice but luckily the driver was composed enough [actually I rolled a Drive Dice] and the tank went into reverse and the gunner acquired the shooter but could not do more. Seeing that his chance to finish off the tank was fading as it slowly reversed away from him, Ichiro sprang from his hiding spot positioned behind the straw fence near the sharpshooter and ran up the road. “Bansai!” His sacrifice shook the tank crew further having one further Command Dice lost.
Kenso, in the door of the rice barn, needed to be much closer and so hoped to move into a better position without being spotted but his nerves …and my dice rolling…prevented his feet from moving.
Meanwhile the Matilda slowly moved backward from the village. Kenso finally called to the Emperor for help and I rolled a 1,2,3,4,5,6 combo! Kenso acquired the location for the tank, ran as few have [ I rolled 20 (inches) on 4d6 !] - having converted the Wild (6) into an extra “Drive/Move Die - which had him reach the distant tank and thrust his lunge mine [successful aim roll] but alas, the blast, while killing Kenso, did little to the armour of the Matilda.
The sharpshooter, lowered his rifle (not rolling the dice for him to fire) and mourned the loss of his comrades, as the green beast moved away….

Saturday, 25 July 2020

Bringing a ‘faust to a tank fight……


“What a Tanker!” is a unashamedly tank vs tank game.
However, wargamers being wargamers,  can’t leave well enough alone and many have done much work to expand upon the original premise to include anti-tank guns and anti-armour infantry weapons.  While I have done so, I was surprised to discover that even the Two Fat Lardies authors have also done their own version!  [ LARD Magazine 2019 ]  Their rules had the panzerfausts/bazookas stationary while I have gone the 'more traditional ' route and play the mobile infantry carrying blasters of tanker hell more in tune with the original rules.

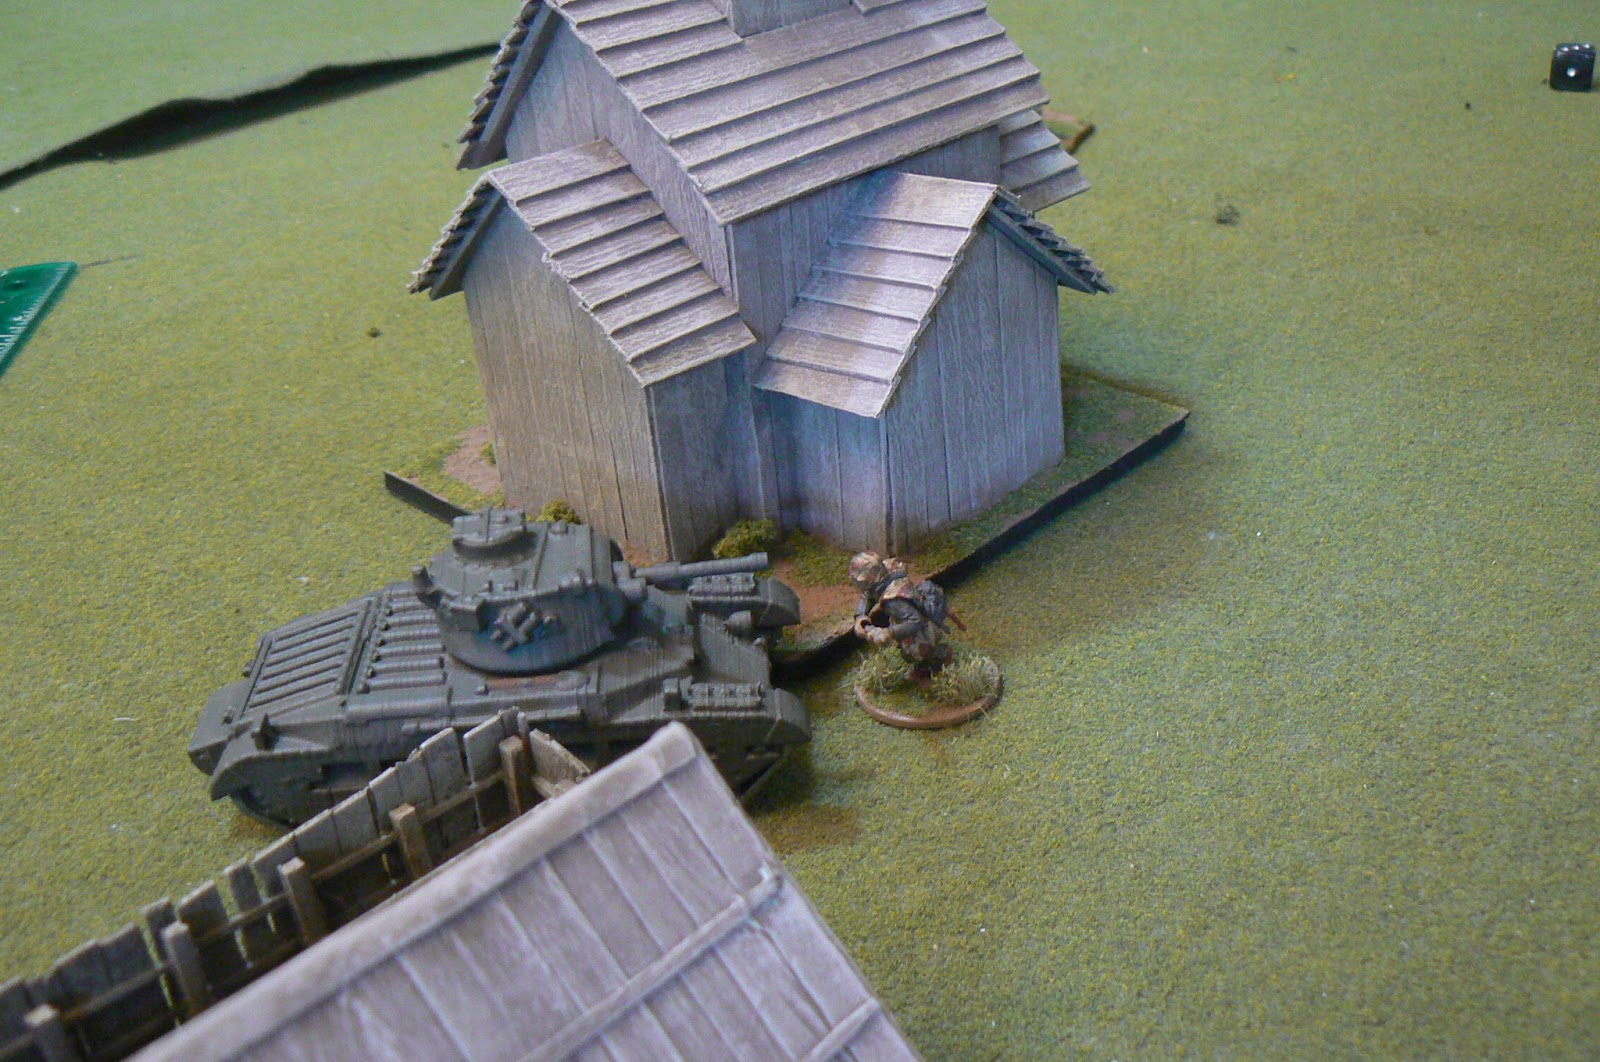
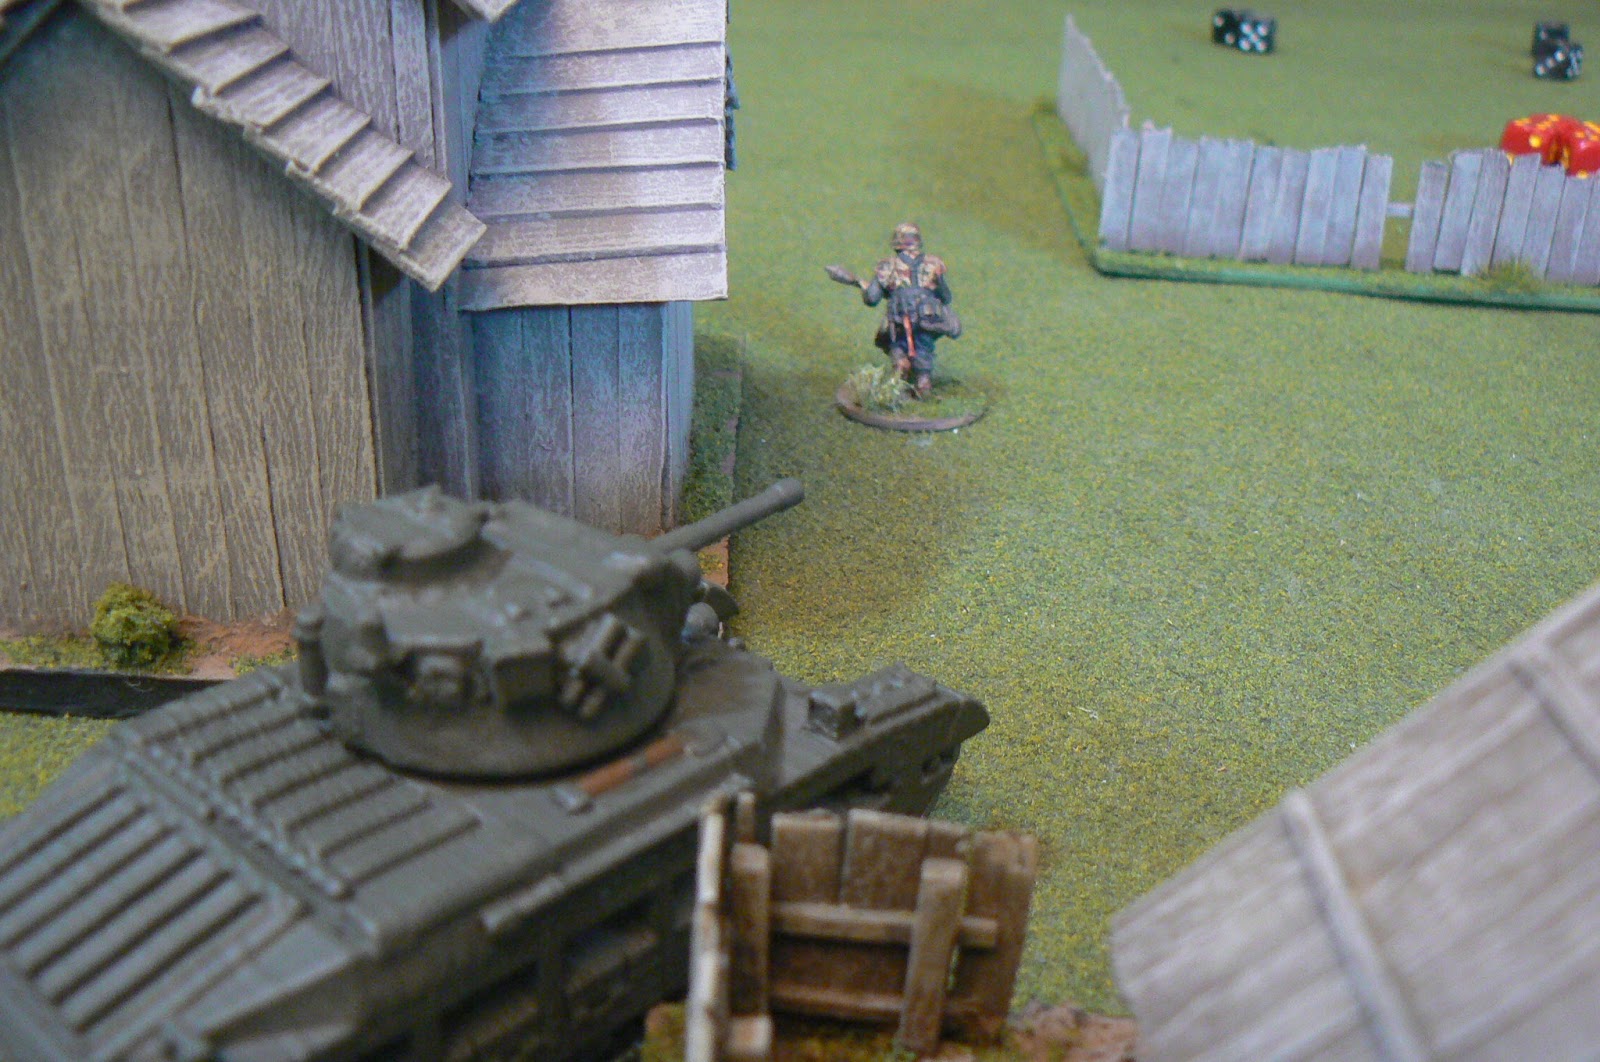
As a play test, WillB was given my 3D print Matilda II - a Lend-Lease provided by the British,  while I played the late war Germans. These are Warlord plastics painted by me recently and armed with the always popular panzerfausts for hunting the lost tank in a Russian village.

Because of the need of certain dice at certain times …and that not happening… it does mean the infantry don’t necessary have free reign and indeed at times became the hunted.  At one point the Matty rounded the corner of the church almost running down one of the Germans who was frightened stiff with fear (he did not get any ‘move’ or even ‘fire’ dice at the time).  The tank could not move any further unfortunately and the German finally turned and made his escape.


It gives me the opportunity to have the late war enemy tanks on the table without the need for me to build an additional tank model to face them ;))


Thursday, 23 July 2020

more Opolchenie


The Opolchenie are Russian militia which served in the Russian armies during the Napoleonic Wars and were especially prevalent in 1812.  While mostly engaged in engineering (...digging) field fortifications but some 10,000 were said to be under arms during the battle of Borodino.
With that in mind I made two elements for our game of that huge battle a few years ago.

However I was given some more sprues of what were Warlord Prussian Landwehr (1st Ed) so I decided to add a third more to my militia force.  It would take only a bit of scraping removing all the "Prussian" bits and putty adding to some of the pants for the fuller Russian look and of course the full beards as shown in contemporary illustrations.


Friday, 17 July 2020

Napoleonic Baggage.


“Napoleonic baggage” is what he brought to his marriage to Marie Louise….
…or perhaps the necessary wagons on which an army must exist.

Needing models for both the grand game and the newer smaller focus of all-cavalry actions, I based both horse and wagon onto thin bases, but then created the thick bases of the grand game for attaching them temporarily.
These are my Dutch-Belgians of the ‘Waterloo Campaign’.  The horses are Essex, the riders plastic conversions, and the wagon is of MDF wood from Warbases.
The double team looks better for the smaller scale game while a single team - below- is more representative in the larger scale game 

Wednesday, 15 July 2020

Scrap Iron


A tank model with this much damage is just scrap  iron  plastic.

My friend WillB builds his nice tank models then kindly donates the left over bits to me. This time parts of a German panzer including a partial turret and hull.  From those I glued on any and every bit or piece which he left on the sprue.  The gun really sets off the model sagging as it is.  I hope the whole image suggests a massive internal explosion.

The model is for my Russia winter 1941 theme for What a Tanker and will be a ‘terrain piece’ for the vehicles to move around or hide


Saturday, 4 July 2020

a 20th C. Roman infantryman....


Inspired by a friend’s inventive mashup of Landsknecht armed with a MG34 WW2 machine gun (!) and images of modern soldiers with very Imperial Roman looking armour of which I have always wanted to create,  I have done my own plastics mashup of a Imperial Roman (c. 100 AD and an Imperial Japanese infantryman WW2 (c. 1940) both by Warlord Games.

Obviously the armour - the famous Lorica Segmentata must be shown - heck, not Imperial Roman without it - as would the helmet which I smoothed of details to get a slightly more modern look.  Steel colour was used but a more modern dull green could be effective for more current looking soldiers.  Two more quintessential Roman items are the ‘caligae’ [army sandals] and the ‘baltea’ [ the dangly straps in front of, well, the dangly bits ]. Both these were kept, but the main uniform is early 20th century.  The Japanese uniform has a long tunic covering the rump which was about the same length as the Roman one thus I painted in a dull red which is over the long sleeves and trousers painted a modern dull colour. As this uniform is from the 1930’s/WW2, I did not go for a baggier camouflaged version and so left the puttees which are painted in buff so giving a leather bound look instead (something picked up from the barbarians in the intervening years?).


Fun little project.

The large amount of plastic Romans I have might still be “amended”.  Looking toward making them the “Lost IX Legio”.  Lots of skeletons, mangled limbs, dead flesh and rusted armour. That could be an army.  Now to get some bits and parts.

I have cheated a bit and already created a ballista crew from the few skellie bits I had at the very bottom of a box for some reason….

Thursday, 18 June 2020

Waterloo Day!


It is June 18th and in tribute to the holiest of days for the Napoleonic fan [ ironically, as it the anniversary of the start of his final political defeat ] it is usual for the wargamer to show his Napoleon model or complete a re-game of the battle or some such.  However, I thought I would show some of the ‘unknowns” of the battle : the Dutch-Belgian Cavalry.

My Dutch-Belgian Waterloo contingent

Now any casual Napoleonic military historian knows of the heroic charges of the French horsemen led by Ney to confront the Allied infantry in square; or the charge of the Scots Greys immortalized by a dramatic painting by Lady Butler.

 But, but, but there were a whole lotta other cavalry at the battle - or at least that is what the orders of battle show us.  What about them?  Well, for starters, the winners get to write the history as the saying goes and the Duke of Wellington, being the winner - OK, then, on the winning side - made damned sure the British were the winners. Oh sure, the Prussians many have helped but calling the battle “La Belle Alliance”as suggested by Blucher? Certainly not,  when a nice English sounding town name of Waterloo was only a few miles away.  However fully a quarter of his army was German, and he did not even mentioned the numbers of Dutch and Belgian soldiers he offered to the gristmill of combat.  It is to those unsung which I offer photos of their cavalry units I made from plastic.  [ mainly 28mm Perry, but some on Fireforge medieval horses and details from various components ]

The 3rd (Dutch) Carabiniers 

The 3rd (Dutch) Carabineers were in Tripp’s Heavy Cavalry Brigade and while many illustrators have suggested they wore a rather impractical large bicorne headdress, Dutch historians suggest they might well have had the the elegant metallic helmet often shown with the more popular 2nd Regiment.

The 2nd (Belgian) Carabiniers 


Next up are the 4th (Dutch) Light Dragoons of Ghigny’s Brigade
4th (Dutch) Light Dragoons
held in reserve at the start of the battle along the Brussels road.  Now, what did they do in the battle?  The British writers do not tell us. However they do offer that the nobel Englishman Earl of Uxbridge,  the overall cavalry commander - and given that role only the day before! - ordered some Dutch-Belgian units to follow him in a charge which they did not.  Thus the label of cowards were attached to all D-Bs.  But if a man you did not recognize, speaking an incomprehensible language suddenly arrived demanding you commit your life, would you immediately agree?!
Anyway,  they are a handsome lot and pretty on the table.


Lastly we have the 5th (Belgian) Light Dragoons who are recorded in combat at Quartre-Bras earlier in the campaign against the very similarly attired French 6th Chasseurs also in green and yellow. Reforming from that combat - or retiring or retreating or routing - all depending upon the narration given, were unfortunately fired upon by friendlies due to the uniform resemblance.  But we know they fought as did probably all the other Dutch-Belgian units and they certainly will in my future Waterloo tabletop battles.

Sunday, 14 June 2020

Battle of Sedgemoor refight

Monmouth's Rebellion of 1685 culminated in his defeat at Sedgemoor against James II Royal Army.  His all-civilian force had little chance against the Royal Army and so risked a night attack,  An early alarm had the Royal infantry formed up and ready.  While the determined Monmouth supporters made a good try of it, it was a fairly quick defeat historically.
Rebel's 'Red Regiment' facing the Royal Scots with plug bayonets installed.

With the alarm as the key, I had WillB as the Royal commander roll 1d6, 6 having alarm early so the Monmouth forces would have much distance to travel allowing the Royals to redeploy, move or await their cavalry and artillery support to arrive (these take much longer to form having saddles to harness and limbers to attach).  A roll of a 1 would mean very little warning was given and the rebels would be at the Bussex Rhyne (Rhine) a shallow dry irrigation ditch which was a pivotal terrain feature of the battle directly at the start.  Of course, WillB rolls his good dice and I start, as Monmouth, at a great distance to the Rhyne.
The Red regiment supported by the Blue Regiment cross the Bussex Rhine to face the Royal Army

During this refight using a mash of Lion Rampant and The Pikeman's Lament, 'Rampanty' rules, the Rebels did make a show of it, perhaps a bit too much as both the Foot Guard and Dumbarton Regiments collapsed under the pressure of the Rebel onslaught, but to compensate for the very few figures I have for Monmouth's civilian forces, I upgraded them.  Their numbers would be added to only should any early units be eliminated so offering recycling (and given a new color of flag!)

One thing about any of the Rampant rules is the activation - or lack their of - for your units can offer much fodder for the narration of the battle.  Frustrated by the lack of action by the Royal Guard of Horse, I offered the explanation that obviously their colonel was still fluffing his wig and will present himself to lead the regiment once his damnable page would find the correct uniform!  It was another three turns before the correct uniform (read: roll of the dice) was found.
In another instance, WillB ordered "a shuffle to the left" by the Coldstream Guards.  "What the hell order is that?!" must have been the response by their officers as no move was made (another failed activation)
Appears the Green Regiment of Monmouth's army is in trouble.  Once at "half-strength" - indicated by the die - it will need big dice to survival any morale test and will now roll only half dice for combat -  a grave situation indeed  and indicated by the rather dark humour of my grave marker!

The late arriving 'White Regiment' (the destroyed Red Regiment with a new flag!) is ready to face the Royal Army.  Monmouth  mounted beside them is not so sure...

Speaking of dice rolling, both WillB and I seemed to make a lot of double 6 and double 1 rolls for activation early in the game both offering good and bad things to happen.  So many that we noted each time we would roll these results - 11 times in total!  [ for the record WillB at 5 double-sixes, 1 double-ones, myself at 3 double-sixes and 2 double-ones ] At one point early in the game a fully 1/3 of our rolls were one or the other of these results!  ....'usual' rolls are not our style....

Nevertheless the Royals finally prevailed with the final rebel unit surrounded and captured so allowing James II to keep his throne for three more years
The brave but foolish White Regiment while closest to the Royal camp,  faces the Royal artillery to their front , Trewlaney's Queen's Consorts to the right and Kirke's Queen's Dowager's to the left.  They will surrender as Monmouth is no where in sight!

These figures painted back in early 1990's have been patiently waiting for this game. I finally got a go at it.  My wife might now say I can again put them back in the boxes for another decade or so....

US "Pony Wars" Cavalry

Awhile back I found a small group of Dixon US dismounted cavalry of the mid 19th century and decided to quickly do them up.  No, I don't have any opposition for them but that is a minor detail...

More recently a friend decided to open up his imaginary 1920's "East Indian" campaign i.e. that of the sub-continent of Asia, to those locals interested in playing (eventually).  As humour, I offered the following "historical" explanation to how a bunch of American c1870 horsemen became involved in a war fifty years and half a world away:

From: General Waywronge , US Army Public Relations Department 
To: Military Allocation and Transport Department, Washington DC,
Date: 3 May, 1920 

Regarding:  Transportation of United States Army Historical Reenactment Troop,  Fort Cheyenne circa 1876. 
Destination:  Northwest Frontier Settlement Theme Park
Request:  Transportation of said troop plus horses, arms and ammunition, to mentioned location with all due haste for annual ‘Red Indian Days’ in June of this year.
———

“Sergeant, where is North West Frontier?” asked the two week old replacement;  he was confused upon reading the request.  The First Sergeant of the Military Allocation and Transport Department, already frustrated by the constant questioning by what he considered to be a halfwit - even by Army standards - did not even bother to look up from his reading of Gunga Din.  “Well it is in India, you idiot, in the North-West part, hence the name.”
 “Got it! North West India.” 
The sergeant, to his pleasure, heard a muttered muttering from the clerk,  “Oh yeah, that makes sense, ‘Indian Days’!

After many minutes of scribbling of orders the sergeant
engrossed in his Kipling book, had to respond to yet another question.
“ Sergeant that's a pretty big area on the map. Can you narrow it down for me?”
The sergeant replied,  “Try Jhamjar.”
“ ‘Jhamjar’, Sergent?”
“Jeez a’ ”, cursed the Sargent, “J…H…A……..”


It was thus that a small troop of US Army re-enactors in bluecoats and armed with old colt revolvers found themselves not pretend-fighting Red Indians in the plains of America but actually fighting Indians with machine guns several continents away

Battle of Hampton Roads ..again....

Based on the TFL "What a Tanker' armour rules,  WillB and I had a go at my "Beast vs. Shingle" game of the Merrimac verses the Monitor naval battle of 1862.
The Merrimac (yes, not the bloody CSS Virginia thank you!)
The pencil drawn rivets shown to good effect.  The turret is a wooden liquor bottle stopper - to scale (~ 1:200 )

Designed to 'feel' like the historical battle i.e. lots of shots, not so much effect and with only a few 'critical' occurrences, the game certainly fills the bill, and can be a bit frustrating (no doubt also to the naval gunners of the battle) how our carefully aimed shot can bounce off the armour of your opponent with the frequency which is hair-pulling.  Fun stuff.  At one point Will rolled his defence dice and declared "Don't bother rolling, you can't hurt me..."  Yeah, fun stuff.  It takes patience and a slow whittling away at the enemy's strength.  The real battle lasted over four hours.
WillB adjusting the turret of the Monitor.  My rather crude and very un-mathematical template is beneath.
The two ships make another pass at each other.  The ships tend to do large lazy loops around each other --as did the original combatants.

But in all fairness, karma did go both ways and the all-important 'critical hit' had his pilot house out of action and thus the Monitor was out of control for a period of time. Now of course it was moving slowly (and slowing each turn) but, by luck, drifted just out of line with all my guns (the Merrimac did/does have several blind spots) and I could do little as I was already dead in the water!  His turret still could turn and with a final, point blank shot did enough damage to have my worn out crew surrender their ship (no more command dice).

Ramming at a snails pace does little effect and the two ships merely rubbed against each other at one point during the game

The making of the ships is described here: my previous post

Measuring Template

A group of us rather distant wargaming friends - two countries, five cities, 500kms between - and this before COVID - have been working on an all-cavalry Napoleonic rules.  Up to this point as we were still developing these rules and as among friends we 'winged it' and did not get very picky about distances and angles and such; " yeah, close enough".  Thus we have had not the need of such devices.  However should we find the odd participant who might well force the issue, I decided we need to determine charge angles and directions so a template is required.  I finally thought about this and came up with this example:

(rather fuzzy photo to start things...)

Photo 1
Photo 1:  the template is the width of a full strength French Cuirassier unit with the angles at 45 degrees
Photo 2
Photo 2:  This shows the start of the player wheeling his unit to the right at the maximum 45 degrees for further movement. Each successive horsemen will be deploy beside.
Photo 3
Photo 3: shows the unit now fully deployed.  The distance is considered to be 6 inches thus far (...close enough) should any further forward movement be required. One inch can be subtracted from the distance moved for each figure less in the unit.
Photo 4
Photo 4:  the template now deployed in the front-center of the formation providing the check of the angle of movement allowed by the Cuirassiers to attack the British Light Dragoons in the background indicated by the left side of the white strip and continuing along the template.  Obviously move it to the other side for a left hand turn!

The templates are made from thin plastic sheets and I have made extras for all the lads (when we next meet..)

You might have noted the poor dead French infantryman on the template.  He is there merely for decoration!  I had a few left over from the Perry Dragoon Box.  I used the British ones as 'rough ground' for the game, so thought to be fair about it....