Showing posts with label terrain. Show all posts

Tuesday, 23 May 2023

Old Collection, 'new rules' (ACW 15mm)

Years ago we lived in a apartment condo during an occurrence of many fires damaging suites, I told The Wife that should we encounter such an emergency to grab the two large duffel bags of my 15mm ACW and throw them off our second story balcony.  Her “what about the wedding photos?!” was dismissed.  Priorities you know…..

But yes, this was, and still is one of my favourite my wargame collections.  Not having brought it out of the bags for many years, I decided to layout my terrain to see what was still needed. In a rather interesting coincidence KevinA emails me that very day with his new ideas for averaging the huge swing the Fire and Fury ACW Rules d10 rolls can produce.  I was intrigued and so with terrain already in place, PeterM joined us as the Union defender against KevinA’s Reb attack. The existing charts using the ‘weird’ d3s, low-average dice, and troop quality modifiers had the game move along in a more realistic manner rather than the ‘I have all the advantages but you rolled a bleeping 10 to my only a 1!!’ situations were avoided.  Leaving the terrain on the table (how real life can get in the way) we played a second, continuing scenario with Craig joining us as "Stonewall" using more of the table for a good game.

(for the record, I decided require better fields but have enough trees. I used only 1.5 of 3 boxes.  One does need many trees for a 19th C. American battlefield.)


The table set up including the fun little additions in my collection including an observation tower (center), and balloon (right center) and solid wood buildings and fences.  Must get some more farm animals; the sheep (lower center) gives a cute accompaniment.


Thursday, 9 March 2023

Not everyone is in scarlet...

 While most of the British full-dress uniform of the Victorian era was scarlet, not all units were thus dressed and the rifle units wear a dark-green, almost black, dress uniform. The Canadian militia, closely following the home-country's example, would wear their parade ground attire, having no other, onto the Canadian Prairies for the Northwest Rebellion campaign in 1885.  These riflemen are my conversions from Perry plastic Union American Civil War miniatures with mostly just a head change using the Perry 'Home Service' helmets or creating glengarries from green-stuff.  The bases are made from a home-made styrene sheet from empty sprues melted in acetone. The log marker, also on one of these home-made bases, indicates the "suppressed" status for the unit.  It is still a visible reminder for the players, yet blending into the terrain.


In the background is a dice tray created specifically for the collection as it matches the terrain mat. It looks inconspicuous on the tabletop hiding as a field.  


Saturday, 17 December 2022

Terrain up

 When asking "What have you been up to?" to the wargamer, the inference is usually "What have you been painting?"  And fair enough, as that is the big chore for most miniature wargamers. But I have tried in the past while to work on the terrain aspect of the tabletop.  Using some lightweight but very sturdy poster boards which seem not to warp with water/drying, I can apply terrain in large areas. Thus I can indulge in creating mini terrain boards of building complexes or fields.


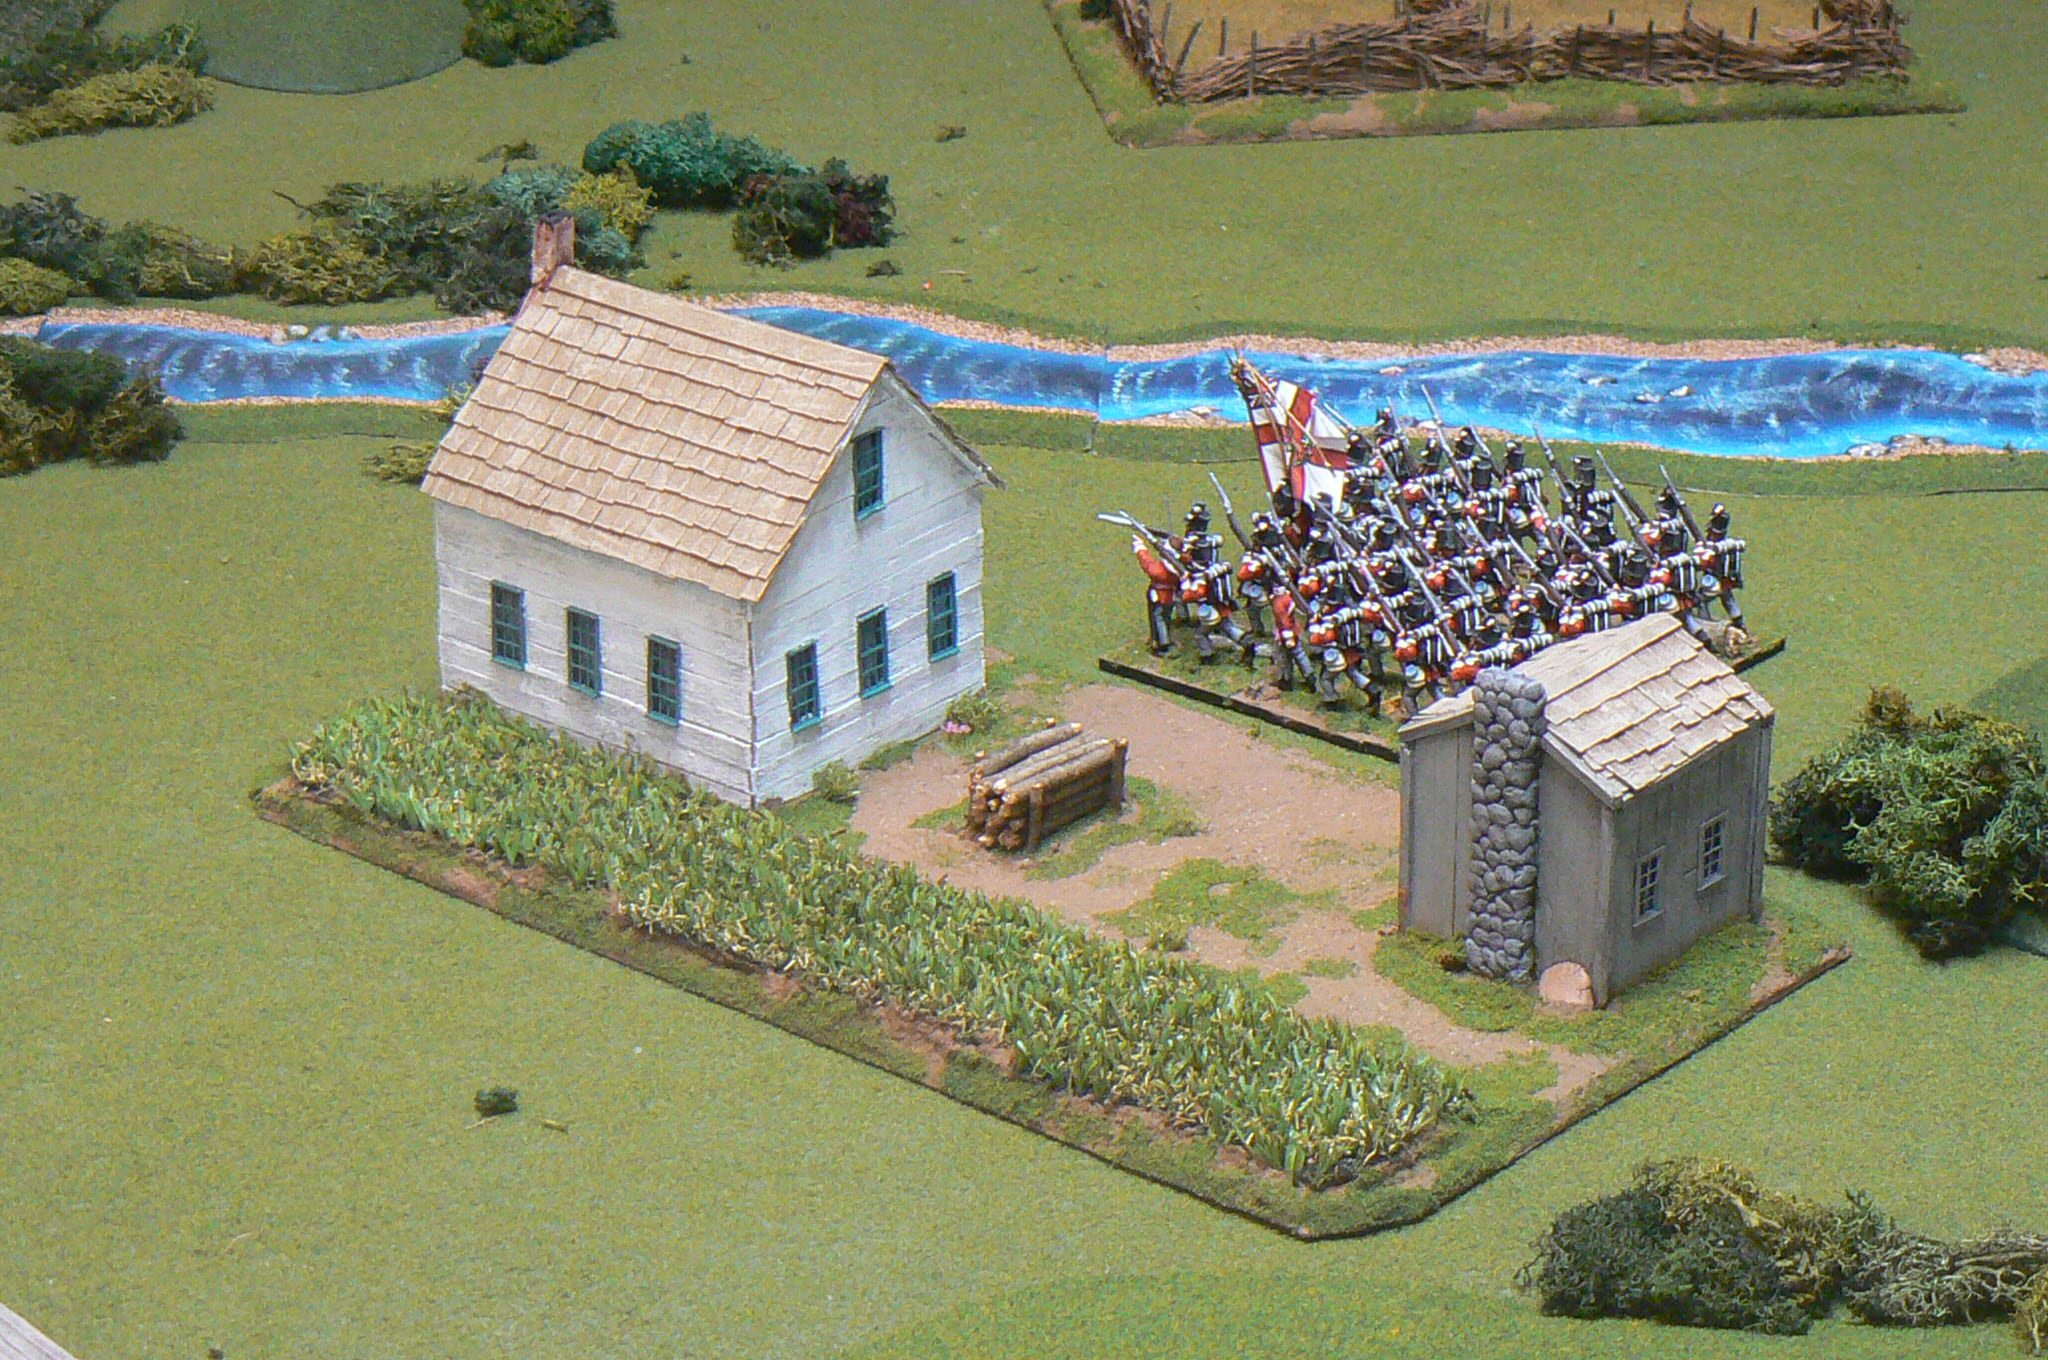
As with the recent posts I usually scratch build out of whatever material is at hand.  Foamcore and coffee stir-sticks are my go-to from which I built a farm house and put together with a small sample of rather realistic looking astro-turf as a crop.

The field utilized some of the "straw" fences previously built but as they were very susceptible to knock over or damage, added them permanently to a layer of plaster for a medieval/renaissance field.


These took the afternoon to accomplish while I listened to wargamer podcasts some of which content complained about the lack of "appropriate" terrain on the average tabletop!

Finally over the week or so, needed some added "jungle" for placement on jungle-print neoprene mats bought a while back.  Not really sure I like the look of the printed mats and they certainly look worse in the photos.  The jungle is, of course, the every popular aquarium plastic plants which were embedded in leftover chunks of styrofoam covered by ground up natural lichen and moss.  As the weather is rather not conducive to the spraying of matt greens to lessen the 'glossy effect' of the plastic, that must wait til spring. 

Poor 'Ieko' with his lunge-mine chasing an Australian Matilda tank somewhere in South-East Asia. While he did manage to hit the tank, he did no damage to the tank...but of himself?...say no more...
The leafy print on the mat is over-scale and not that convincing.  I might sell the mat and just build more jungle.

Again poor "Ieko" this time exposing himself to the rifle fire from the accompanying Australian infantry  - in the background - during the second game with the boys on Friday night. The first rifle bullet put a big hole in his shoulder, the second mortally.  The jungle bits look a bit better in this angle. The non-commercial made body of water was purchased at a convention years ago forms a very nice terrain piece. This open ground allowed for "Joey's" fine shooting. - a rare night of good dice rolls by me!


Wednesday, 11 May 2022

Dice Fields


My newly painted 103rd Foot for the War of 1812.  It participated in the Niagara Region in 1814.  Old Glory 28mm.  I have now some 15 units of redcoats for that war and have painted over 500 figures of 28mm Napoleonic era British Infantry for my various collections....oh dear that is a lot of scarlet and lace....

Inspired by a gamer-friend's idea, I recently created nice terrain pieces but also very utilitarian to keep dice together and not hurling across the table when rolled by some of the more 'energetic' players.  These are for North America c.18th and 19th C.  I will be building others for the other various topography to blend into the terrain work.

The newly built "dice fields" in my quest to have 'visual continuity' for the table-top. I subsequently added more 'shrubbery' under the fences to make them a bit more 'organic'. Made from coffee-stir sticks.  But ready-made plastic fences could be employed;  as can walls of various constructions.


Sunday, 17 April 2022

Successors on the thin side

 I have been smitten with the construction of ancient armies using the Wargames Atlantic skeletons and did some as Celtic Ancient Britons.  The WA sprues are obviously designed with a Hellenistic Greek flavour in mind containing pike arms which so far had not used. Pikes were used by the later Successor armies of Alexander fighting the incursions of Celts ( “Galatians” ) and even employing elephants.   Hmm, that’s kinda cool, and allows me to pick a third different army to play! I had a 3D print of a Woolly Mammoth printed which I then modified mainly by the tusks (I could not find a plastic skeleton model - at least to scale…) and begged wargaming friends for some spare ancient Greek type plastic parts who kindly provided enough to fill a 24 point Dragon Rampant force (thanks David and James!).  


The 3D print was extremely poor so needed to literally pore a bottles of liquid Super Glue over the model to prevent it from layering away as I stripped off the supports. Uggh!! Luckily avoided gluing my fingers together but certainly swore a lot in the process!  The purple cloth over the mid-section of the elephant seemed to be a common feature of the Hellenistic elephants - or at least to the modern illustrators and sculptors - and was needed more on the left side than the right side to cover the gap from missing ribs as the model was breaking apart in my hands! I needed to re-sculpt major portions.  

The model was a good in design however as the thin howdah could be removed and a more substantial one built on the flat surface with styrene sheets and corner pieces. The large Greek shields give more ‘identity’ to the model.  Finally, I added the thick ropes holding the fighting compartment onto its back with green stuff.  

The cavalry were constructed again with horses using melted down plastic sprues to represent the decomposing flesh.   Full torsos for the riders were used needing only to add skeleton arms, legs and, some helmeted heads.  Not really natural poses (They started as infantry and it is really tough to glue on stiff legs into place while also imbedding in a still curing green-stuff saddles!  But heck, these are the usual uncoordinated muscle-less skeleton dudes!)   Added the flowing capes from a medieval set and gave them a bit of color as being the elite Companions.  

Along with those figures for the collection, I made a temple out of styrofoam and wine corks while watching sports on the tube.  A thick layer of watered-down PVA glue (White Glue) gives a good hard coating and nice surface to paint.  

Roman Auxilia protecting the temple
Celtic chariots moving past the old 'white marble' temple
The Successors advancing on, rather a-historically, Imperial Romans in a recent game using a three-way fight scenario. The Galatians/Ancient Britons are facing more Romans on the other end of the table. The two would-be allies then fought against each other to a draw with the remnants of the Romans looking on....

I think I have now throughly quenched the ancients builds and currently have yet another British 1812 unit on the paint table.


Tuesday, 4 January 2022

the Tower still stands

The first game of the year was a small medieval ‘Lion Rampant’ game with WillB and his young son going against each other defending or attacking the siege cannon firing against my newly painted Tower.  (see my previous post link for its construction)  Hey, I just painted it so OF COURSE it has to be part of the scenario!

I addition to the painting, I added a separate rocky base of insulation foam sheet 

Quickly inventing some quick rules for the guns damage firing at the tower, I thought I had cleverly hidden a small unit of foot knights under the roof but WillB, noticing the slight tilt in the roof ( he is a civil engineer and I never claim to be a precise builder!) adjusted the model only to discover my ruse.  Luckily I made my several activations to have the knights climb down the ladder, over the rocks, and into action but only to have them fail their courage after only one combat and run off into the distance!  

The enemy had already retreated away and then I careless rolled this for their courage!

One of the medieval siege cannon firing on my new tower.  This is a scratch-built affair made from a plastic tube, balsa wood, and brackets of strips of paper.  The barrel, wheel-barrow and chest form the rest of the 6-man crew!

Archers form the main component of my Battle of Crecy era collection

The Dunkurque knights chop into one of the English archer units. A rather unequal affair.

However, Arthur’s steady arrow barrages wore down the Dunkurque Militia of his father and the final cannon’s crew were slaughtered by Arthur’s men-at-arms before the tower could be felled by the cannon shot. 


Wednesday, 10 March 2021

Just 'spruesing' around

 Inspired by videos on clever uses of left-over, ready for the rubbish bin, throw away plastic sprue frames after removing all the possible useful bits, I gave it a quick thought and came up with using sections as iron beams in construction of a bridge. 

My newly made “iron” bridge.  Scratch built (obviously!!) 


All the girders?, joists?, umm, the ah?…well, the iron bits anyway…. are cut from discarded plastic sprue frames and the bolts/nuts are thin sections of unused plastic medieval spears.  Note the use of “discarded”, “unused”.  While I might say it is to see what creative uses can be made from scrap, one could also say that I be just too cheap to get a good model.  But then, I can say that I had good fun for only a few pennies of cost.

The photos show some of the construction.  The length of the bridge was limited by the longest frame available.  I was not willing to try to shave down all the nobbly-nibbly bits  (see his YouTube vids for more ideas: youtube link   )  as this would compromise their widths and thus construction - and frankly a real pain in the *blank* to do!  So only certain lengths could be used.  Also, only half way through the cutting did I notice that the outer frame and inner connecting sprues could be different widths.  Hmm. 


The construction was done for effect and certainly not to any engineering specification.  It is sort of a cross between Bailey Bridge, a Tress Construction, and an Iron Girder form.  Civil engineers might have a chuckle but it does bear the weight of a tank, so it can’t be that poor a design! 

the napkin might be there to soak up any blood from cuts. Went unused ...this time.


Like the news anchor who is all suit-and-tie above the desk, but out of sight of the television camera is wearing comfortable sweatpants beneath, I don’t usually bother about painting that which is not normally seen.  But the following photo does show my use of discarded sprues.

I hesitated about using the rather glossy and very non-military green plastic primer but managed to cover with a dry brush of a lighter matt color then matt varnished (twice!).

The deck was made by using wooden coffee stir sticks on a card backing.  I used PVA/white  glue down the middle and a slow settling epoxy along the edges;  an idea to limit warping.  While it worked, I used too much PVA which, once touching the top surface of the wood would not take any staining, and the epoxy seeped through to the surface creating a yellowish stain.  Well, darn.   So I just used some earth-coloured paint and covered up the stains and dry-brushed some tread wear on the surface.  Quick and easy and looks OK-ish.  I think of it as a newly built bridge so not much wear on it yet.

The width of the model is about 7.5cm or 3 inches, wide enough anyway to take a 1:56 tank


Thursday, 12 September 2019

"barbed wire" and tutorial?


I looked upon some lone “dead” sprues and noted the regularity of the tabs (the round bits that stick out from the frame). Like for use as the bases of fence posts. Very thin fence posts of course.  More like thin metal spikes really.  Well, if I use thin plastic rod, drilled in a bit to make them stronger bond, I could use wire to make “barbed wire” emplacements. Hmm.

Do I need these defences?  Not now but that lack of need has never stopped me from creating a bit of terrain piece before….so I set about.  The two sprues were divided into even frames for which I cut from hardboard 4 similar bases. The holes drilled and rods glued in.  The frames were covered in cheap self-hardening clay.  While I intended to just paint the grey clay an earthy color (aka WW1 mud and all) and just flock the edges (to blend it into the tabletop), the cheap stuff cracked a lot so I was forced to put on a glue layer to prevent more cracking later and cover these crevices with flocking.

showing progression from top to bottom
....to finished terrain piece. 

My wiring quickly had the rods snap off as they were unequal to the strain of the looping.  So much for that idea.  But then I remembered purchasing some flexible “barbed” wire at the LFGS.  
I decided upon a diameter based on a 28mm figure and made tight curls using a lip balm container (!)  which had the correct measurement.

I placed the curls carefully over the rods (painted a metal color) but had not the need to attach. They lay there and could be employed for other tasks if needed.

I suppose I should really paint the wire a steel or metal color and add rust effects for 'realism' but the shiny wire has the new and dangerous look to it!

… of course now I am thinking to scrounge around for more dead sprues - of appropriate requirements - to create more of these defensive positions.

Sunday, 25 August 2019

WaT Wreck Obstruction


While I prefer the wide open spaces of the Russian Steppe to conduct a game of What a Tanker - more bang, less messing about - an occasional bit of ‘obstruction’ is not amiss.  I do have fences and trees and the usual terrain, but to keep a different look and a bit of 'eye-candy', I created an old “wrecked tank”.
It was much a "hmm, what can I do with this?" idea swiftly made after I had torn all the supports from the 3D print tanks I was provided. Necessary for the print construction, these bits are usually tossed as unusable scraps but my ‘cheapy wargamer brain” thought that, with a large degree of “wargamer squint”, it kinda would work especially with a liberal covering of 'snow'.
 The base square edged hopefully makes any LOS easier to adjudicate.


If Napoleon and Wellington ever tweeted:
In an internet cafe somewhere near Hougomont, 18th June, 1815.....
Capt. Mercer noticing Wellington looking over his shoulder. "The Ogre is online, permission to give him a scathing comment?"
Wellington:  "Certainly not!  Generals have better things to do than to bad tweet each other!"

Thursday, 30 May 2019

Battle of Dresden - at Enfilade 2019

Battle of Dresden

This Napoleonic battle of 1813, was the second largest of the wars.  Our developing ‘big-battle’ rules is specifically designed to play these massive affairs but even these are challenged by the size.  However, the Allied command conveniently did not utilize large portions of their numbers and to fit it comfortably into a single game session with a convention table restriction and time restraints, I reduced the element numbers by some third.

As with the dedicated group enjoying these rules, the players each painted up their own command with a common basing which really helps with the look of the game increasing its ‘visual continuity’.  We had DaveB with his commands of Mortier (the French Imperial Guard foot) and Ney (the Young Guard), St. Cyr by James, all the Austrians done and commanded by Seth and the remainder filled in by myself.
viewing from the index area of the above map
The Prussian commander moving his heavy horse toward Dresden and the awaiting French. Later in the battle he would be reversing course!  While not strong, apparently the French artillery did sterling work.  
Overview- looking from the opposite westward view with Dresden on the right, the Allies to the left and the Great Garden (Grosse Garten) the landmark area of this battle made from a piece of hardboard for playability.

As I gave myself the “adjudicator” task, I was not intimate with all the actions of the game, moving from one small judgement situation to the next, but the game kinda followed history compressing the two days into one.  In the game, as on Day One, the Allies attacked in the middle forcing the French back to the artillery emplacements before the city. However, the French sprang back, in this case with good artillery support as per Day Two of the historic affair.  On the French right flank, BobE commanding most of the French cavalry with infantry outnumbered the Austrians who were separated from the rest of their army by a rain-swollen river crossable at only one point at Plausen.  Historically the Austrians were severely defeated in this area…as were the Austrian elements on the tabletop…

Marmont's French move to destroy the Austrians.  Elements of my French army.  While mine, the following photo shows four different painter's collections in action together.  They look good together.
the action in the centre and in the distance the Allies right/French left flank.

On the French left flank, DaveB, used the advantage of the French Guard elements to push back the Russians under Ian and Prussians under BobS to their breaking point.
See DaveB's blog post and his activities during the game/battle at: link with a very well written account.
We ended the game without the need to have the obvious happen having those commands inevitably rout off the board so ending with the situation very close to the historical battle.

Saturday, 1 December 2018

Retreat from Moscow - the game


Well after a vacation to warmer climes, what type of game would you think I would like to do?  Something with steamy jungles? Perhaps an amphibious landing on a nice tropical beach? No, I decide upon the frozen tundra of Russia….. and the famous Retreat from Moscow of the Grande Armee!

To be honest, the vacation had little to do with it.  It really all started with a large white tablecloth I have had for years, and a chance encounter with WillB at the club when he was selling (giving away, really) some of his Perry ‘Retreat’ figures.  I couldn't resist. When I heard that the Seattle convention of “Enfilade!” theme is to be ‘Winter’ , well…….heck.


With my interest, Will later traded with me some further of his Retreat collection…seeing my weakness :}

The Perrys do packs of six foot and three horse, so I choose to continue that organization of units as not to make the whole project overwhelming.  In any rules, you can have various means “stretch out” the elimination of figures/units and I did not see the need for masses on the table.  This game is to be a lonesome party of stragglers in small units seeking a different way home from the mass of the disintegrating French army.

Because of the small numbers, or perhaps because of them, I saw this as another of my “convention games” to be played in a noisy environment by a bunch of guys not necessarily up on any particular rules or even the period at hand.  Certainly I feel overly complicated and ‘accurate simulations’ don’t really work at big events so I opt to simple and easy to command rules.  This often means I will need to make them myself to fit the type of game and the numbers I have.
So, in this case, while the Russians (mainly peasants as that is what I ended up with) could be commanded indeed by other players, it proved interesting putting them on “auto-pilot” by using a chart and basing their ‘commands’ on proximity to the enemy and a die roll to see how they react.

The rules, brief as they were, with myself putting in about a half hour of thought were kinda based on the ideas of Lion Rampant (with low amount activation, differing hits equal casualty amounts and differing abilities).  **spoiler - they proved to work very well indeed.
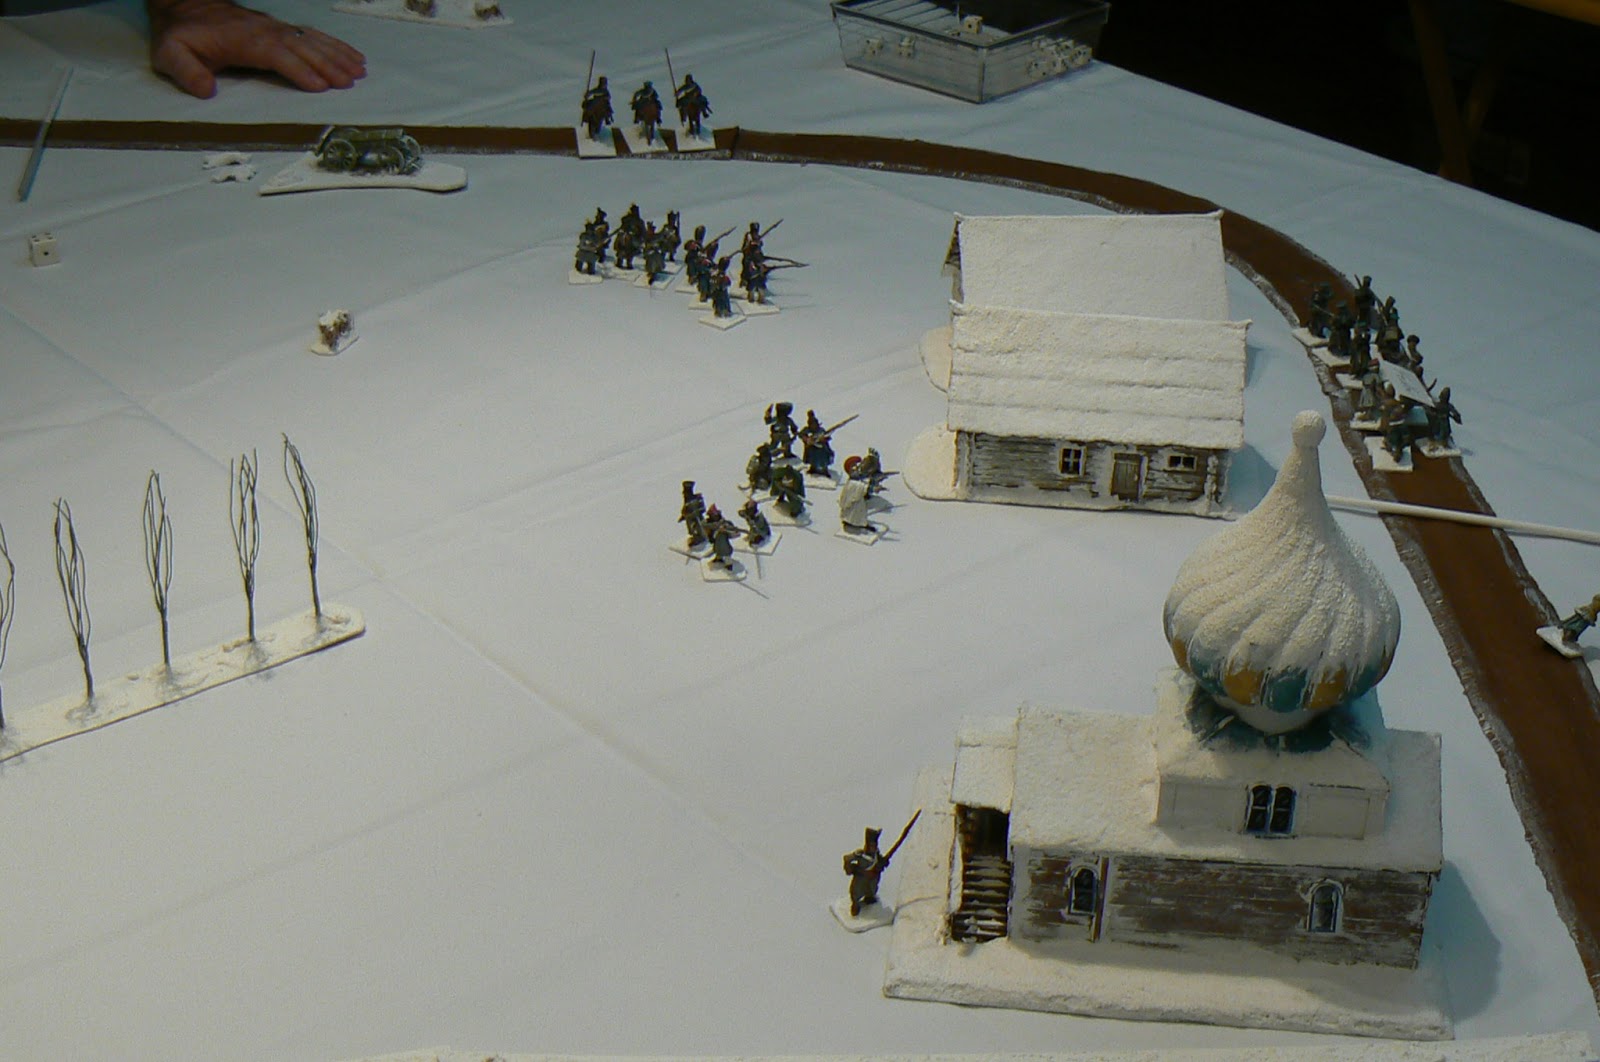
The individual groups of survivors make their way past a lonely Russian village through the snow of a Russian winter.....

Of course the other things to create the game are the painting and the terrain.  The painting was necessitated by Will’s units already done.  But this actually proved a blessing because while not my usual style, it gave me inspiration to keep it simple and basic.  Then, from examples of other painters of frozen conditions, dry-brush a light grey over all areas to give them a ‘cold’ look.  Thus unusually for me, I have another’s painting in my collection.
The 'Poles' leading groups of French dismounted cavalrymen and French infantry towards the lone bridge and survival
Russian Jagers behind the houses of the village.

As mentioned the ‘mat’ is a white tablecloth I had.  Not realistic, but practical.  The Russian houses were plastic ‘Pegasus’ types previously painted by me but not to my satisfaction so they were very much “re-purposed” covered in white paint and model snow.  The Russian church I had built a while back (see: my previous post on the church build)  also became “re-purposed” and covered like-wise. Undeveloped x-ray film provided by a doctor gaming-buddy of mine years and years ago (obviously as they are now have been digital for decades) provided the cold water stream.

OK, the game.
Firstly I told Will, Jim and Peter there are no morale rules.  Units can fight on until all the figures are eliminated.  The rational is thus:
“In these frozen winter depths of despair, if you surrender the enemy will certainly kill you.  If you run, it is into the white wilderness.  To give up is to die frozen.  The only option is to keep fighting until the bitter end or continue your trek home….”

Having no morale in the rules, certainly makes everything a whole lot simpler!

While not really ‘morale’ I put in a simple rule that units sustaining the most casualties in combat or any from shooting will retreat back a full move.  That simple rule, ended up to be used tactically by the players to ‘push’ the Russians out of the way in many cases thus shooting but so losing a turn of movement just to clear a better path.
My repurposed church and leafless plastic trees in the background
Movement and shooting distances are determined according to my painted wood dowels.  Surprisingly the only things NOT to chance within the game!  And, of course, painted as to 'blend in' to the terrain.  My OCD of wargaming.....

The winner is the player with the most figures off the far end of the table.  Jim, selected the mounted French contingent and the ‘Remnants’ (of the GrandeArmee) .  His cavalry raced literally directly through the countryside so having the terrain potentially causing harm.  But as I was rolling.... and sixes were needed, so he worried unnecessarily….( I think at one point I threw 48 consecutive dice and came up with only three individual 6s and so not enough to wound, let alone eliminate a single figure….)

Jim sat back to watch Peter and Will leap-frog each other, fighting off the peasants and the much tougher Russian Jager regulars.  Yes, the Cossacks were there (of course!) but insisted to but be merely be a presence and only coming into range once to be shot up by Will’s commanded ‘Old Guard’.  Surprisingly to all the players, after initial fears of being slaughtered, Will and Peter exited with the same numbers as Jim so all were considered survivors …until perhaps the next village is encountered!
The "Old Guard" appropriately providing the final rearguard.

Some good ideas for further betterment of the rules were offered and so I will go into the next game with Version B and knowledge it will probably work for a good game and entertainment of the players.


Monday, 8 October 2018

Cheval de frise


A couple of wargaming buddies started their new c.1706 Great Northern War project and I finally could not resist joining in.  One of the few conflicts I have little knowledge, brief research had me going to collect forces of the Electorate of Saxony which allied itself with WillB’s Russians against KevinA’s Swedes.

Apparently not too confident about defending against the aggressive Swedes, it was common for these early 18th C Saxons to employ these spiky defences along their whole front.
my finished examples on the tabletop

While I have a few of these in metal, I felt I would need more.  Inspiration had me look at the used sprues of the cavalry and plastic toothpicks bought cheaply at the dollar store for a very inexpensive solution as the following photos illustrate.
Metal version (manufacturer unknown)
Pieces of the sprue cut off. The two will be then glued together to form a square post.
Plastic toothpicks. The ends are cut off to length.  I used only the red ones!
All glued together.  The model glue melted the plastic to allow the toothpick ends to remain upright with only a couple moments of being held in place to my surprise
Primered in black, now looking the part
Finished version.  The figure is a Warlord (nee Wargames Factory) plastic WSS era horseman.