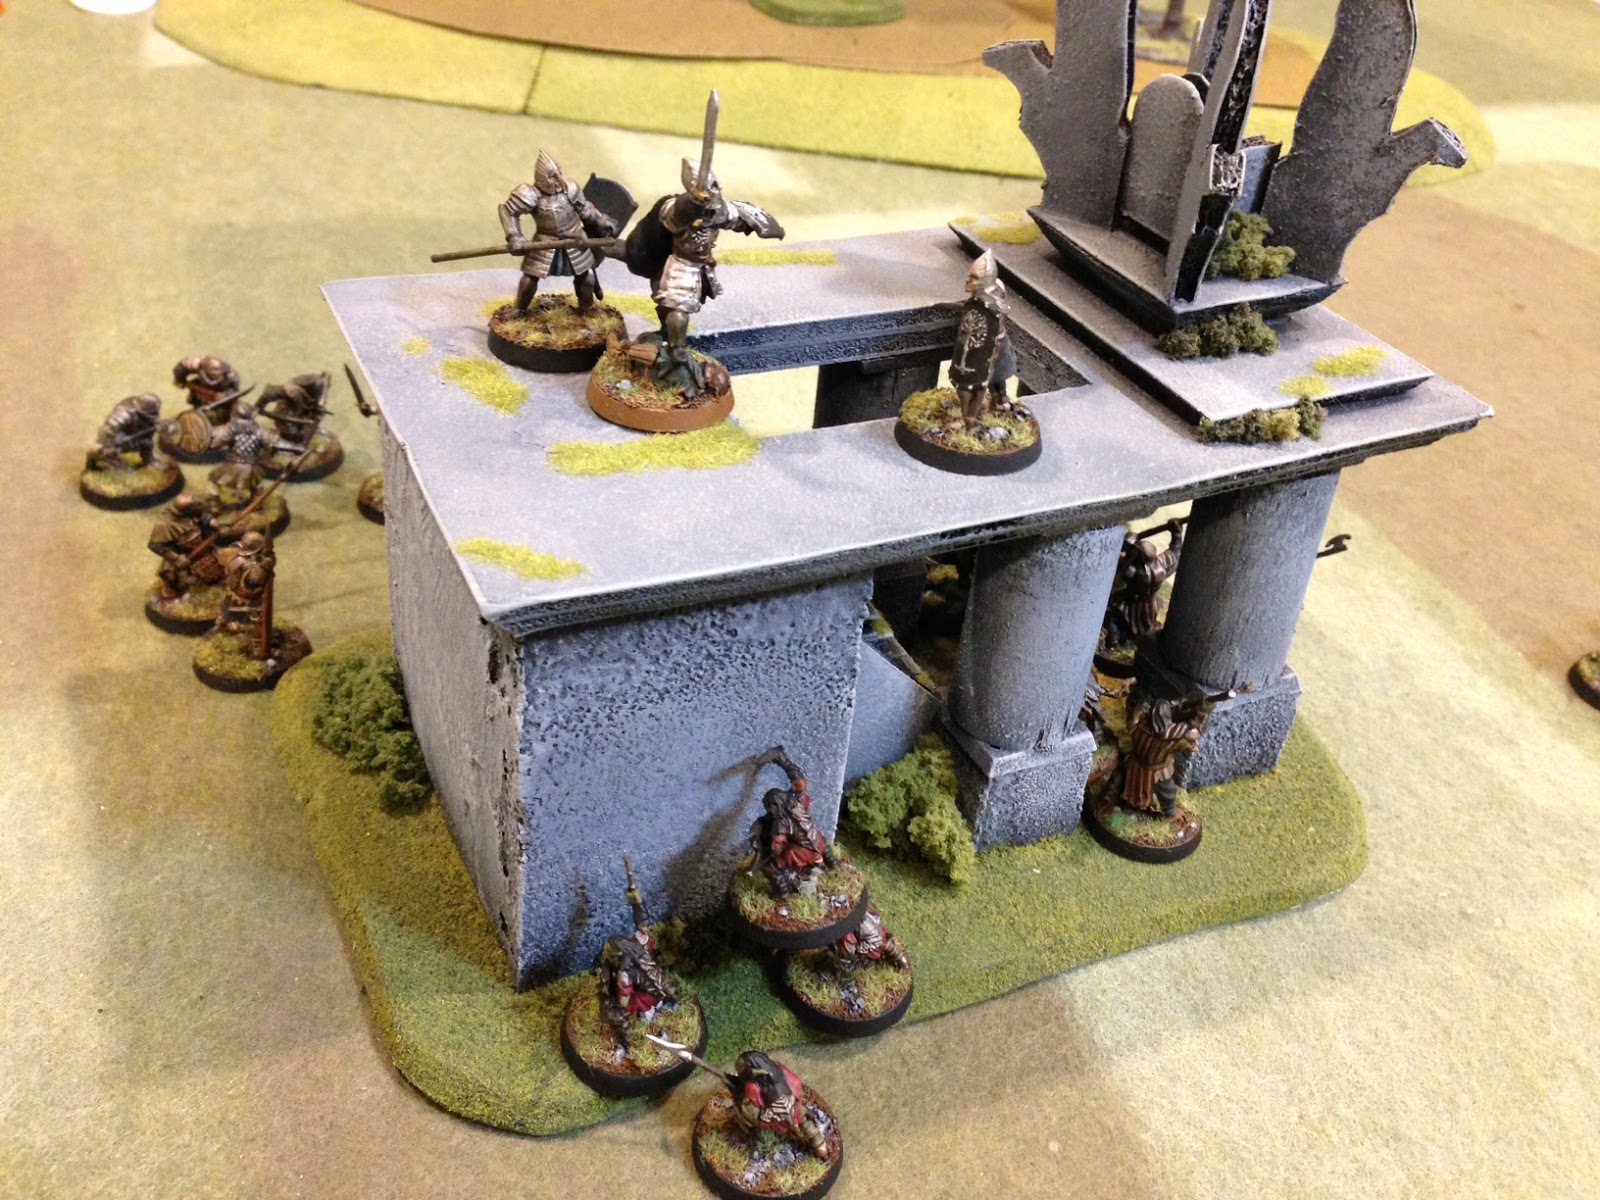
Having a holiday Monday available, I invited some of the boys over for a “get them out of the box if you got ‘em” or in other words "Bring You Own 'Battle'" medieval tilt using Lion Rampant. There were 14th century types, a 11th C. “El Cid” contingent, a Lord of the Rings force, and a War of the Roses retinue!
Did not really matter as they did great slaughter on the fictional Crypt Hill.
The battle scenario was set up by the players themselves as the respective sides could pick a, b or c options and then I would compare and match these maneuvers to prepared maps of my table. Thus a very different set up to the usual bland and uninspiring “You guys on that side and we on this side. Start 8 inches on the table.” game.
Also introduced on the moment was my card system so each player was given a number of shuffled playing cards equal to the number of units he currently deployed, the player having, say, the #4 card could play any of his remaining unactivated units during the fourth round of the turn. Each side would play its 4th unit with the one side always going first in this version of IGOUGO. After the end of all units activation attempt, the cards are shuffled and so a different sequence is produced for each side. As the sequence is not known, so a nice unpredictability of action is the result.
Photos of the action.
Wednesday, 19 February 2020
Sunday, 16 February 2020
Saratoga’s Battle of Long’s Redoubt
| the Brunswick array moving to positions towards the American log emplacements |
This is a fictional and solo affair using my newly reconstituted “Saratoga Campaign” Brunswick Germans (and units of historically attached Hesse-Hanau) against American opposition.
In this case my entire German force will be assaulting the Americans behind formidable log emplacements. I place the units almost by random, looking for natural start positions for each side THEN decide what might happen. In most of my readings of historical battles, I don’t think the actual Generals did things much differently….
Turn 1, Brunswicker
The very first activation rolls a double-six!. So with that bonus, the Brunswick dismounted dragoons earn better discipline for the battle (spoiler: it really does not help) Next the Light Infantry advance. Then, of course, I roll the opposite of bonus, double ones, which consulting the chart has the Rhetz Regiment commit friendly fire upon the backs of the Lights causing disorder. The other Brunswick units advance without incident however the artillery is bogged down in the rear.
| The Brunswick Dismounted Dragoons |
The American heavy gun opens up on the advancing Germans and while causing casualties, the Germans would continue their forward progression.
| The American position |
| The German advance |
Despite their increased discipline the dismounted dragoons were still occupied on patting themselves on the back to move this turn. The Lights continued to advance even with their disorder and the rest of the Brunswick army continued their advance - - except for the artillery no well to the rear. Must be a broken wheel perhaps.
Turn 2, Americans
The the Lights now in range, the American light artillery on their right end of the line fired at short range causing more casualties but again the Lights shrugged them off. The heavy gun in the middle was apparently reloading and the light gun on the far left was still out of range. But now the American militia opened fire as did the 2nd NY Regiment and this proved too much for the Lights who bolted.
Turn 3, Brunswicker
Again the Dismounted Dragoons rolled double-sixes for the activation (its either really good or really bad with these guys!) causing unknown fire upon the American right but this did not faze that militia unit (rolling 11 for morale!)
While the rest of the Brunswick force marched in steady line to the final fence to cross, the artillery again fails to move. It will be relegated to the rear for the upcoming battle as it cannot now be of any support to the assault.
Turn 3, Americans
Some of the American artillery again fires and while causing more casualties, the German morale survives.
Turn 4, Brunswicker
During this turn the majority of the army readied themselves forming up in close-order while the Hesse-Hanau unit moved to the left.
| The heroic Hesse-Hanau Regiment |
Turn 4, Americans
While the American artillery took advantage of the tighter German formation and causing significant casualties, Brunswick morale is high.
Turn 5, Brunswicker
All units (!) begin their advance through the open area cleared by the Americans in front of their log defences.
Turn 5, American
Militia fire forced the Dismounted Dragoons to retreat. Now in range of the skirmish rated militia units (at only 12 inches) and the lone regular unit of the 2nd NY, the Riedesel and Rhetz Regiments were taking particular punishment and both are now under 50%. But morale continues to be good.
| The large Brunswick units showing their casualties even at this early time of the battle. |
Turn 6, Brunswicker
While the Rhetz unit stopped to doff its disorder (at 50% it will now ALWAYS be disordered to some degree) the Riedesel Regiment rolled double sixes (my dice in solo games always seem to be hot or cold) thus earning itself two activations so with that went at the double at the American position. Unfortunately being at half strength it failed to make much impact (only 3 dice) . Not all was bad for the Brunswickers as the Hesse-Hanau charged and got into the American position.
| Riedesel's failed assault |
Turn 6, American
Not all was good for the cheering Hessians as the displaced militia responded with shooting and the light artillery pivoted in place.
Turn 7, Brunswicker
Seeing the units in his immediate area at half-strength or unwilling to move (both full strength units failed to activate) the Brunswick commander contemplated ordering a retreat while some of his army was still in tact but continued failures in activation and the lateness of the day had him/me give up on the assault. While the main army was to retreat the Hessians took the American light gun without casualties.
Turn 7, Americans
The units around the Hessians all failed to activate and even the heavy artillery could not load a round against the retreating Germans.
Turn 8, (Darkness)
The lone fighting unit for the Germans - the heroic Hesse-Hanau finally wore out and also failed to rouse themselves to further action. That would make seven, yes 7 failed activation rolls in a row! I think the dice gods are telling me to go to bed. Thus the Brunswick direct assault on Long’s Redoubt failed with heavy casualties.
| The pink colours of the Hessian showing their position inside the American defences |
I used the “Rebels and Patriots” rules which follow the “Rampanty” style of play including activation. Great for solo play as the units absolutely will not follow orders and do their own thing which is great for the narrative, probably realistic in a way, and certainly does not allow favouritism for one side or the other <grin>
Sunday, 9 February 2020
The week in gaming
Still haven’t got to my “Saratoga” game set up on the table for the last three weeks..... but did take my Samurai on the road for a Monday Game.
The Oyamata were to escort the musicians and gifts to a wedding while the rival Takeda wanted to halt the convoy. Used Lion Rampant rules with an add-on for the Teppo (handgunners).
![]() |
| The Oyamata procession |
![]() |
| Takeda ashigaru soldiers |
![]() |
Short story: the Oyamata players rolled poorly and wore out fairly quickly. Extremely poor courage tests by both sides had units vanish rather than be battered. I guess one’s life (based as ever on the randomness of the fates) was not worth the honour of wedding gifts, even for the Samurai…..
| The mounted Samurai who, with rather poor activation rolls, did not move but once the entire game (but didn't really need to....) |
-----
On Friday, it was the ClubNight and, after offering scenarios set up for Will’s Jacobite game (see his blog: link ), I got into Lisa’s Congo rules game of slavers vs tribes vs rival tribe three-way. She made a call for additional figures and a couple of us offered what we had; and ended up playing in the game anyway.
| The jungle, the Lisa version, using plastic plants to good use. |
The interesting rule introduction by Congo is the method of unit ordering and activation.
The player has a handful of cards each. The cards have an initiative number together with symbols for movement (footprints), shooting (bow and arrow) and/or panic (umm, something scary to Congolese warrior). These come in various amounts and so the player can pick three of these to play in their next three plays. You can sorta guess what you might need to do in the next 3 turns but things could certainly change which makes the selecting difficult and hit-and-miss.
| The 'ordering and activation' cards. The rules use an assortment of dice |
| Various 'stress' tokens. Too many and you start having fellows leg it. |
| more examples the activation cards. In this case, my turn is probably after everyone else (the top '2' is low). I can shoot with 1 unit and move another. |
Points were allotted to victory conditions. As a Masfusi I wish to rescue our prince, and the other captives, kill slavers and prevent the hated Kosi from doing the same. It did not start well for me as, of course, I picked up the dreaded chit as I entered the rough terrain and so panicked so firing at the nearest group (friend or foe). It was to be my fellow Masfusi for me to blast away using my only trading-muskets causing death and wounds. This then panicked that group who fired back with accurate spear fire, killing three of five musketmen! Meanwhile another group of mine were shooting at the slavers. There was only a small chance to killing one’s own but my fire firing did just that! While usual for me, not a great start….
I managed to gain the most victory points at the end so redeemed my early ineptitude however. I still think I eliminated more of my own than the enemy!
Quote of the game: the Kosi player having fun with a small group of poison dart armed Pigmies (pun included??) also envisioned his tribe to be cannibals. A rule of ‘Congo’ could have you add a stress token to your unit for a chance of saving figure from being killed. “Nah, we’ll eat him later” We had a light and fun attitude to the game….
Tuesday, 28 January 2020
LotR bash - Fight for the temple
I am not a Lord of the Rings type of follower. I do not have any of the figures or such (the ones in this game are from a group effort using the Game Workshop minis). The fellows at the game almost kicked me out upon my declaration that I have not seen any of the films…. However, a tabletop miniatures battle is a universal thing and so I was not out of my element. I took a bunch of orcs, some with bow - who I subsequently demoted to mere warriors upon their distinct lack of hitting/killing anything!
The main target was the temple building which was defended by ChrisO and his Gondor heavy armour chaps who I wore down until Kev’s goblins could swarm up the walls and, ahem, overwhelm the defenders. It came to the last turn and the ‘end of the game’ roll which came just before the collapse of both sides (depending upon morale tests) as both sides were on their very last legs. All very nail-biting....
Of particular note was the newly painted Ent (a living, moving and fighting tree) who, while falling to the efforts of two trolls, did last much longer than expected - being fresh to the tabletop and all…
Wednesday, 8 January 2020
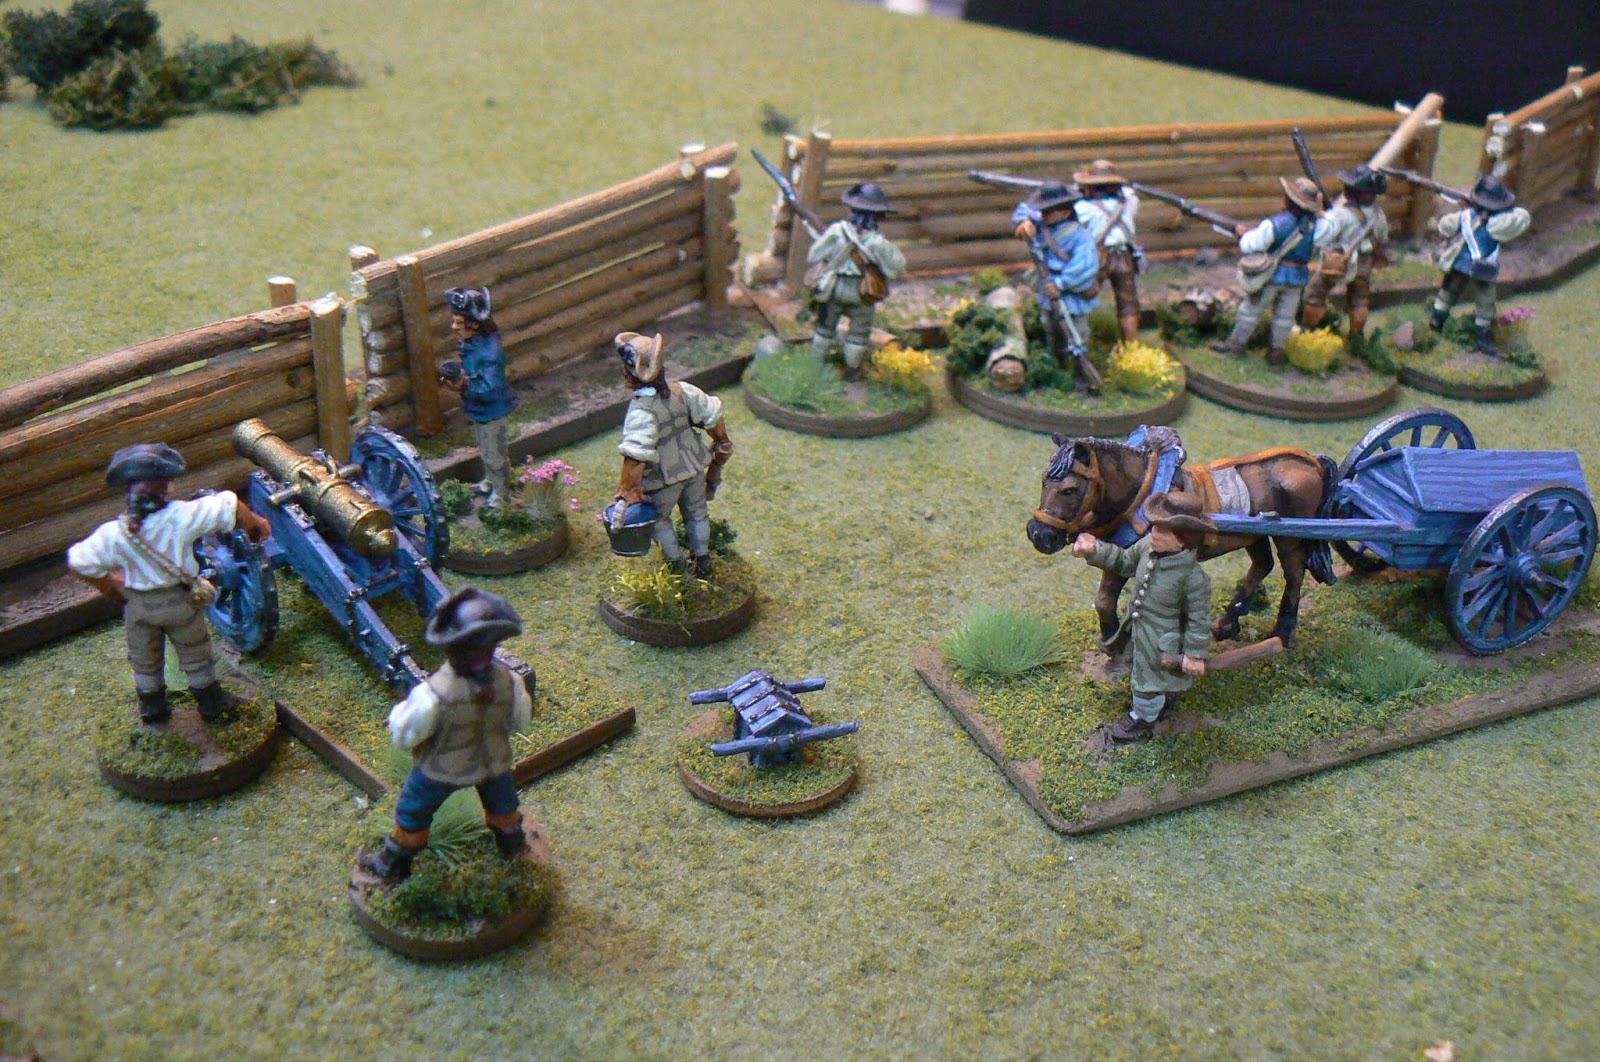
Saratoga, here I come!
Finally had the time…and mental momentum….to finish my American contingent for my certain portion of the American Revolutionary War Saratoga campaign. The battles to come will be a contrast in tactics. I have certainly taken the mythical view so thusly the Americans will have good-shooting small skirmish militia units, some as veterans, with (for now) only a small Continental regiment and with artillery support verses very large but timid Brunswick Germans units. The latter formed a large portion of the British army descending the Hudson River Valley in 1777.
I have taken the narrative of the historical campaign battles and thus will have fictional scenarios involving the Brunswickers attacking across open fields with the Americans firing into their ranks (an aggressive commander [Gen. B. Arnold?] leading); the Germans attacking American defences well defended by artillery (allowing for American commander ‘Granny’ Gates’ “let ‘em come to us” plan if came to pass); or reversing the latter scenario and having the Germans defend their built defenses against the American assault per the Breymann’s Redoubt engagement
| 'Benedict' encouraging the troops |
| The militia form up behind the log emplacements |
| One of the 'heavy' guns and another unit of militia skirmishers holding the right of the camp |
The American figures are mostly Perry “Southern Militia” re-purposed [ obviously MY battles will be fought on exceptionally pleasant October days for the boys to be in shirts only! ] The Germans are old Foundry SYW Prussians (the 1777 German uniform continued to be virtually a copy or close enough….) The Americans happen also to be artillery heavy but they did have a fair amount of guns in their encampments historically so. Guns are points expensive in RaP so it might be fun to play out a scenario in which the American camp is defended primarily only by artillery and see if the firepower is enough to stop the German advance.
| Part of the much more numerous German force |
For once, I actually had a plan for the collection before ( ! ) painting/basing - not before having the figures but 2 of 3 in the planning is good for me! Other than perhaps another Continental unit to make it a bit more historical in composition, I have enough in size to conduct the battles I wish to run and the historical context to provide the scenario inspirations I will enjoy.
Saturday, 21 December 2019
The "Cattle" Expedition
Up to now I have always had plenty of time to engage in my favourite hobby, but with the recent employment at a 9-5 job, my wargaming time has significantly decreased. As my dearth of posts recently can attest, it is certainly a time killer. “Try to do any with that AND three kids!” was the retort from a couple of my wargamer friends!
Anyway, as a last, before Christmas game, I hosted a colonial British Afghan expedition to supply cattle to a far outpost. Using my “veteran” (painted c.1987) Ral Partha ‘true 25s’, I had all six of the players play on the same side, while I would control the natives via “auto-pilot” chart and hidden deployment.
In a rare cooperative method the gents allocated troops and deployment sharing an overall plan. Sort of countering this, I also added my patented card sequence which uses a sequencing hierarchy to have the players move, should they choose, before others. Some used this, others just flipped over the next card they had, but this together with the rules (The Men Who Would Be Kings - TMWWBK) ensured a lack of foreknowledge of who-moves-next.
| The Imperial force marches |
| The logistical centre of the column advances |
| The Gordon Highlanders having covered the left bank of the waterway, crosses to join the column |
We still employed the rule’s activation which had the effect of the metal soldiers acting more prudently than their erst while commanders who might wish them to advance across open ground to “check out the unoccupied village” but the unit quite unwilling to move from their cover….
It came as no surprise to the colonials that as they neared their destination, the inviting British Regimental flag (they could not have seen the blood smears) was taken down and replaced by a horde of tribal warriors. These were largely dealt with by rifle fire from the near by rocky knoll (and my usual very poor dice rolling for the apparently inept locals). Throughout the affair I would regularly roll low - a string of four 1s at one point - so the tribal warriors seemed to have little heart in fighting and would rather withdraw than to engage, but much to the relief of the Colonial players.
| The fort with one of the tribal units having charged outside the gates |
| The Highlanders, having gained the top of the knoll, exchange shots with the unit in the tower. |
| The mountain gun, at the right, sets up for the final shots of the battle. |
….then put on their coats and went out into the rain for home…..
Friday, 8 November 2019
Monitor and Merrimack
ACW naval - modeller madness, part 1
A long time ago I built “The Monitor” the famous American Civil War ironclad warship. Now I am not a particularly fastidious model maker and I like the task of creating a “reasonable” likeness out of cheap materials at hand. No $28 anchor chains for me. I choose materials like foam core, bits of cardboard and whatever is lying about. For example this Monitor is of a foamcore hull and a plastic hairspray lid if I am not mistaken.
I happened to open up the box containing said model which had a self-written note stating “DO NOT make another model as you have lots in 1:1200 scale already!” Oh man, I have to write that to myself?! But I did a Minion “pfft” sound and shrug and, seemingly without conscious thought, went about making the companion “Merrimac”
[editorial note: While purists, Confederate sympathizers, or legalists might take offensive and state the ship was christened “CSS Virginia”, I am going with the ‘usual’ Merrimac name]
| Not small (approx. very approximately 1:200) Note the rather poorly rendered grating of the 'old' Monitor. |
I am doing the waterline version which does not show the oft illustrated version of the full hull - even the beautiful Thoroughbred Models 1:600 version shows the full length which was submerged. Probably done for any ramming or collision events in a game. I must look into that. However, the basic shape was done. The gunports were simply carved into the insulating material and bamboo skewers were embedded and cut off at the same length. After starting to cover the pivot gun ports at either end corners (as these were not so skillfully completed!) I read that the historic ship went to battle without this protection. I left the ones done but did not now need to do the others.
[editoral note: Found on Wikipedia "these six bow and stern gun ports had exterior iron shutters installed to protect their cannon. There were four gun ports on each broadside; their protective iron shutters remained uninstalled during both days of the Battle of Hampton Roads."]
So I got lucky then in my haphazard research and construction!
| my Merrimac |
The deck details on the top are old railroad window forms. The smaller intake chimneys on the top deck are cut out corners of round plastic sprues and the large stack itself an old cardboard tampon applicator - hey, it was the perfect dimensions for the 8 foot diameter chimney….
![]() |
| The full hull illustration found. The end, bottom portion of the casement and hull all were submerged. |
The odd shaped pilot house pyramid is a bit of green stuff; and the false bow - to keep the water from piling up against the front casement - are pieces of card painted as the wood timber construction. The small rowboats to each side are 3D prints made to my specification generously by ChrisP, a wargame buddy, with my davits plastic packaging material cut into shape and inserted into the hull.
| With flag at half-mast and a boat along side are we witnessing a surrender? Na, just my (wrong) flag was not permanently attached. It was the first Confederate National Flag that the ship flew. |
ACW naval - modeller madness, part 2
Played a few games using the two ships as I am developing rules for the ironclad fight based on “What a Tanker” . Fun, two-player game, but with the same circling maneuvering, firing with little effect, as the historical engagement!
| The Merrimack and Monitor (MkI) in game action in muddy waters |
Having played this naval game with DennisC at the club the previous night, I noticed some damage to my Monitor’s turret, no doubt caused by moving around the gun directional marker required for this glued down cardboard part. The top grating was represented merely by rather poorly painted lines (I did not say I was a good model builder!), so I was willing to remove to repaint and replace.
As I built the vessel a long time ago, I discovered I had simply glued two metal gun barrels on the bottom. If I paint the interior black I could use an open grate as did the historical ship. It would look good. As I was looking for appropriate ‘grating’ I discovered some other bits I had collected for making of other ships including various caps for monitor style turrets. Among these were liquor bottle stoppers. As in the back of my mind the Monitor’s turret, especially now, seemed a bit off. Too large. So curiously, I checked the dimensions:
Monitor’s turret was 20ft diameter by about 10ft high. So to my 1:200 scale it’s diameter should be calculated as 20 feet x 12 inches = 240 inches divided by 200 (scale) = 1.2 inches (19/16) or 1 and 3/16 inches.
….checking the wooden cap to my booze bottle stopper… 1 and 3/16” !!!
The height is perfect also! With the attached cork trimmed this would allow me to give the model a moving turret. No more required marker.
Well then, a change was in order and Monitor Mk II was begun. After a failed first attempt at drilling gunports into the solid wood (luckily I had several of these stoppers….) I was happy with the holes created (drilling was ideal as the ports had rounded ends). The muzzle ends of 25mm scaled barrels were cut short and glued in and the turret painted black.
| the Merrimac along side Monitor MkII...now better in scale.... |
The hull is cut from black foamcore from a template scaled to a top-down view of the ship. The smoke stack of the older model was not replaced as historically this was not installed and in any event, I had this in a wrong design anyway!. The overall shape and details are more historical accurate but Iron plates were again indicated by lead pencil lines and rivets by dots. Lots of dots, but done while watching sports so not so tedious to do and surprisingly effective.
Anyway, not an award winner by any means, but looks ok to be pushed around on the table top.
![]() |
| an artists impression of the Battle of Hampton Roads and the two famous ships |
[The “decommissioned” older model is now going to help my 15mm armies with offshore support]
Friday, 11 October 2019
WaT battle of a nameless town
Another all-tank battle in the frozen depths of the Russian winter of 1941….
We had four players with the Russian players, DaveMcN of course taking, what he believes to be the best of the Soviet tanks available, in the T-34; and his comrade Francis taking two of the T-26 (points equalling any other tank). The “CocaCola” Dave and myself taking a Pzkw III and Pz38t respectively.
A humous point of the game having (the usually Russian-playing) me wanting to fire upon the Pzkw III as ‘C-C’ Dave had driven his tank around the far side of the houses to face Soviet Dave who (through my misinterpretation of the rules) was able to drive his T-34 across the table and now also facing the ‘wrong’ direction. Even with a flank shot that I could not get many shots in. The bad, bad and few dice! Francis
| Showing the t-34 (left foreground) facing off with the Pzkw III (this side of the house) both facing in the 'wrong direction'. My Pz 38t on the right and the two T-26s in the background. |
| all the combatants within close range of each other! |
Sunday, 6 October 2019
What a Tanker! BIG battle
I wanted another go at “What a Tanker!” so I put out an email to the usual club crowd of my hosting. I got a couple of replies which was usual. What I didn't expect the number of players joining up…just before starting I looked around the room and there were the usual games going on - the fantasy crowd and the small games along the window wall, the big-table small ship naval game, the WW1 Canvas Eagles game at it usual table - but nothing else. Lots of empty tables as all the historical wargamers were here at my rather white table, many with their own tanks, ready to start shooting! I was a bit stunned to be honest. Eventually we had 12 players! I have never heard of a WaT game having such numbers. Luckily I could find or have a few of the veterans of the game find dashboards for all. But 12?!
I quickly had each German player pair up with a Russian player. I instructed the German player to roll his command dice at the same time as the Russian with the effect that we had only a six player rotation overall. If the same two players were able to shoot at the other, a simple roll-off would determine who would ‘activate’ first. This only occurred a few times during the game and did not cause any problems. This new system worked very well and I was quite pleased with myself for inventing it off-the-cuff as it certainly lowered the downtime of the players awaiting their turn.
Amusingly it was only halfway through the game when I was asked loudly by several players to repeat the scenario victory points. I guess all that before-the-start-discussion was mute once the shells start flying (grin) . The Russians I declared must be within 4 inches of the distant church while the Germans must have at least a tank in the burnt out village to win. I hoped this would encourage movement forward rather than the “sit and shoot” tactic. The Russians were more aggressive and a Lend-Lease Matilda, driven by a rookie player encouraged by the tank’s high armour rating (for this time of the war in 1941!), finally got in a position to make a late game run to the church but the continual pounding by the Germans had reduced his command dice significantly. He got close but no drive dice doomed his fate. Aimed flank shots had his crew bail out. The Russian last hope was a t-34 but it was rammed (!) and enough dice loss also doomed this Russian advance.
| my t-26 following the Matilda trundling forward ...to its, and my demise in a turn or two... (note the white washed PzKwIII in the distance, and the couple of Pz 38t lurking at the woods) |
showing all 6 Russian tanks (2 are already done for) In the background is the Russian Matilda - camouflaged near the trees advancing with the rather dubious support of my second t-26 (photo by Bill E) |
My couple of vintage t-26s did not help much (I spawned the first one only to have the second reduced to the same fate…not surprising with seemingly tinfoil armour) With none near their victory spots the game ended in a draw. But the players seemed to enjoy the game which is the real victory.
Subscribe to:
Posts (Atom)