Tuesday, 14 August 2018

ACW: 20mm in the Wilderness


Joined DennisC’s game of 20mm American Civil War Wilderness Battle(s) on his special designed mat for the table; a very large dark green outdoor carpet with exact cutouts for the rare clearings in this heavily treed area of Virginia some 150 years ago, unfortunately laying between Washington and Richmond and thus, a battle zone.

The two yellow stars represent the two crossroads the Confederates must take to prevent Union reinforcements coming.

The figures are 20mm metals in Dennis’s collection (but a good portion painted by myself a few years ago) using the new brigade version of “Fire and Fury”.  These employ the same, rather overly complicated, IMHO, firing charts that the regimental rules used.  Some of the players had a tough time trying to figure out how to go thorough them and seemingly forgot each turn forcing me to have it at hand and calculate over and over. This task certainly took much of my attention away from my commanding my own forces (so much so that I think I failed to move some brigades for a turn or two!)
Some of the Union boys (painted by me for Dennis a few years ago)


Command control was important for a huge game like this, as Dennis does a very good job in setting up a historical affair but perhaps a bit to big for the limited time at available on the club’s Friday nights to have a satisfying conclusion.
In this case, the conclusion within the umber of turns, and real time, was a “cheesy” move by John to sidestep his lead brigade, so successful it was behind the Union front lines (!) onto the crossroads yellow star to claim ownership thus eking out a technical partial victory for the beleaguered Confederate side.

As you can see in the photos, “fog of war” were the blocks of wood which hid the potential forces of both sides placed in their historical positions.  As “Commander” of the Rebs, I gave detailed instructions to all three of my co-players who nodded their agreement, then immediately proceeded to wander about doing their own thing!  Sigh. ‘Friction’ indeed. Interestingly I had recently read a wargame magazine article in which the author was suggesting that special rules were not needed to create confusion or command control difficulties for armies on the tabletop; just use lots of players!  Now I know how Lee or Grant felt when battles and their sub-commanders did not proceed as anticipated.
large Union out flanking move...or faint with few or none?  The use of blanks.

John on the right, was rewarded for what he admitted was lucky rolls for himself and poor by the Union player by gaining control of the reserve troops formerly commanded by myself.  Isn’t the dictum “Reserves are to reinforce breakthroughs, not to stop them”?
My other reserves saw an opportunity to race up the other road in march column to take the undefended other crossroads but a single brigade, unengaged as Colin, in the Rebs centre, opted to do a two-on-one attack, leaving this lone brigade to move across the road to block the advance and pour fire on the column.  That the fire-effect was poor (Jim L, the Union player having a rare bad die roll) did not prevent the “blitzkrieg” advance from being halted and the chance of the Rebs down that road was done.
big fight in the woods

The many blocks of Union turned out to be many blocks of troops and thus the Confederate advances could not break through…. I really thought many would be ‘dummies’ but as Dennis, somewhat smugly suggested, “ some are ” (…like only one or two !….)
Great scenario with lots of potential for different outcomes with different dice rolls!  However, like R.E. Lee knew some hundred and fifty years ago,  the Union numbers are hard to beat.

Saturday, 4 August 2018

The Cognac Delivery

The cognac must be delivered!

My usual ‘go to’ scenario for any era, is to have one side escort a wagon of booze, while the other side is tasked to take it for themselves.  It is thus that in the midst of the Russian 1812 campaign, a French cavalry commander has demanded that his precious supply of cognac (being French of course!) given a very large escort, to be moved across the table to be safely delivered.  The Russians want it also and casualties be damned!
My cuirassiers moving over the narrow bridge

Again, a playtest for our Napoleonic all-cavalry version of “Lion Rampant” rules, the French column had my newly-painted Chasseur-a-Cheval followed by a strong contingent of cuirassiers in the lead.  The wagon followed, with Peter commanding the rear guard of two companies of Dragoons and a company of the 3rd Hussars painted by Will.
The French move through the Russian town with my newly 'recruited' 6th CaC in the lead blocking the way!

The cognac wagon had not quite reached the bridge so the French column was strung out with the lead elements still within the confines of the town and the rearguard still in the open areas from the bridge. The race was on whether the French could move out from this poor tactical position before Will’s Cossack horde could attack the exposed rear guard, and Kevin’s and Jim’s Heavies and masses of lancers could cross the table to take the French lead elements before they left the town.  The activiations, the essential key to the Lion Rampant rules, were to mark the crucial points of the battle.
But finally the two companies of the French Chasseurs move toward the Russian dragoons
The cuirassiers move out of the town allowing the following cognac wagon to move along with the rear escort of dragoons in the distance.

Now, as any wargamer knows, the newly painted unit never does particularly well in its first tabletop encounter.  ‘Urban Myth’ or not, I have had this happen so many times not to believe in its truth.  In this case my very fresh 6th CaC missed its first two activations!  As the lead unit within the town, it caused a bottleneck, forcing the cuirassiers to slowly move out to meet the Russians through the narrow streets. Of course this meant the wagon was delayed and more time must be spent fighting off the Russians…..once they got there.  But in good JimF fashion, his activation rolls were horrible and his Russian Guard Lancers and compatriots moving in group formation were halted for several turns and thus not in position to block the French within the town.
a nice birds eye view of the battle with Will's Cossacks in the distance left, the French within the town and the Russians moving in from the right. Off camera, further from the right, are Jim's Russian Guard Lancers.

The battle thus broke down into two isolated actions with Will’s Cossacks dancing around looking for opportunities for attack over the creek or across the narrow bridge while Peter looked to defend these points effectively.  But few casualties resulted.
Action later in the game of Cossacks trying to force a crossing of the creek to harass the French rearguard.

This could not be said of the battle to the south of the town as cuirassier and, yes, finally my CaC attacked the effective Russian lancers and cuirassier units.  At one point late in the battle, Peter looked over to my portion of the table and asked, “Where are all your units? Just a little while ago the table was full of cuirassiers!”  Yes, there was heavy fighting but with the French down to mere fragments of companies of horsemen left, Jim did not roll high enough to move his Guard Uhlans into position to attack the wagon and Peter, rolling for the important cognac wagon, managed to get it to safety!  As the Duke of Elchingen exclaimed, “It was a near run thing!”

Fun game.  Much good discussion about the rules with “less is more” coming to lead the agreements.

Thursday, 2 August 2018

General Grouchy

I recall one of the players during a playtest of the Battle of Wavre awhile back humorously complaining that his wife must have had told me give him "Oscar's" forces upon looking at the command labels.  No, not grouchy like the Muppets' character ,  nor even a military person of a poor disposition, but the commander of the French Army's right wing during the 100 Days Campaign.

The most famous story of his career is one that he did not march to the sound of the guns of Waterloo but continued, as per the instructions he understood, to pursue the Prussians. The story goes that he was casually eating strawberries as Gerard, his corps commander, demanded that he march to Napoleon.

It is from this event, that I used two of the Perry Generals to image this exchange.
The muddy track of that day is apparent.  The square frame is to include a small die for game purposes. I think the raised fist and snarl of his face gives the right effect to Gerard's anger over Grouchy's decision.  
the other signpost reads "Waterloo" ...of course....


Thursday, 26 July 2018

As the music ends...

During a solo playtest between Russian vs French cavalry forces somewhere deep in Russia,  I was playing 'mood music' with the soundtrack from the movie "Enemy At The Gates" (WW2 Russians defending Stalingrad).  During this music the French die rolls were, even for my standards, very low so losing combats, failing courage and/or rally tests.  However, immediately upon its ending, Russian rolls then became horrible, losing 2 vs 1 combats, failing to move, etc.

Coincidence?  Probably not....

French Dragoons (at left) taking some time to cross the creek as their compatriots (off camera to the far left) previously decided to gallop across only to lose half their numbers in casualties to the slippery rocks and muddy bottom,...or as one might well imagine with the number of poor dice I rolled!
( My scratch-built building and WillB's cavalry horde)

Friday, 20 July 2018

With Dunkirk behind us.

Everyone loves a nice wargame table and so I was attracted to CraigM's wonderful looking buildings and effective fields and roads during last month's club GameNight.  Also I wanted to see how 'Chain of Command' worked so I offered to join should he have a spot.  Apparently my German opponent and myself as the gallant French defenders of a bridge somewhere in northern France a few miles away from Dunkirque were novices to the rules so were ably instructed by Gord and Craig respectively on the many subtleties of the Two Fat Lardies rules.

The nice terrain made the game very attractive. The French (my) position was the town while the Germans would advance from the far side.
The scenario was for the French to hold off the German advance while Belgian engineers wire up the bridge.  In addition to my small force I had an 'unreliable ally' AT and squad made up of French but from another unit.  Only if I rolled poorly would they find somewhere else to go.  And yes they did....
My very exposed (and soon to be hors de combat) French squad. Somewhere under the bridge the Belgian engineers are trying to determine which wire goes to which ignition switch.  My poor rolls of the dice did not help them make these determinations quickly.....

The engineers would take x number of dice to set the wires.  I rolled 3 consecutive ones during the first three turns of the game.  Sigh.  I guess the wiring was bad.

Trying to figure out which dice did what activity (only those who have played these rules will know what I am talking about) justified my French command ability
.  I had a good shot at a PzII with an AT but, again, the dice failed me and little occurred during that "perfect opportunity"
After one shot, these guys found they had other places to go.

Eventually the Germans succeeded in shooting me out of strong building position while my poor infantry caught out in the open died under the hail of bullets.  My force morale wore steadily down and my force buggered out, leaving the Belgian engineers several wires yet to attach. One further step back to Dunkirk.

Tuesday, 17 July 2018

within the bigger battle....


….while the main infantry battle raged on the left flank, Napoleon sent a brigade of his cuirassiers together with some dragoons and hussars to capture the Russian redoubt of artillery playing havoc with his reserves….

So within the context of the main story, our playtest game of cavalry only Napoleonics using our version of Lion Rampant had French dragoons and hussars to take the redoubt while my cuirassiers were tasked to keep the masses of Russian horse from interfering.

I had the Russian divide up their larger number (but equal in point value to the French) between WillB, JimF and PeterM but roll for their starting positions.  This was to simulate, to a degree the Russians sending in troops from various spots of their reserves and some of the positions were made difficult to manoeuvre as a rules test.
WillB's Cossacks (Perry Miniatures)  Home built Russian village by me.  Wheat fields are a cut sisal foot mat.
WillB’s beloved Cossacks were first to move the attack rounding the village only to stop with numerous failed activations which he explained as the Cossacks suggesting they were not about to make any such charges having the enemy “having guns, sharp swords, and such!”
WillB's Cossacks, some still treading on winter ground!
Kevin with the dragoons and hussars surprised us by using carbine fire (!) to cause casualties upon the hapless asiatic horsemen.  The tactic worked well with him making most of the high activation rolls.  That could not be said of his dragoons who had a hard time getting around all the limbers and caissons (or so it would appear from his rather numerous failed attack activations!)  to attack the near defenceless Russian artillerymen who fought surprisingly well (we gave them a 6 on rolls to cause kills on the attackers)
French Dragoons slowly working their way through the Russian artillery
Meanwhile, Jim with all the Russian lancers charged and counter-charged with the French cuirassiers but found the additional stamina (armor) of the French horsemen hard to gain hits upon.  Of course much ‘discussion’ resulted from this   >)   In the end the talk turned to tactics and with the difference in movement, thus charge and counter-charge dynamics, the heavies were thought to be more vulnerable than it would first suggest.
The initial clash of my French cuirassiers (bottom) vs WillB's painted Russian lancers (top) commanded by JimF. Peter with his Russian cuirassiers can be seen in the top left.
Peter with only two units in the centre but those being the strong Russian cuirassiers, chose mostly not to use the ‘group move’ activation as that “put all into one basket’ but had each unit move independently to have “at least one available…on average” (he is our “Mathematician”).  He sat just out of the French heavies movement range content for the counter-charge if needed.  At that point the rules had the shot extend out to allow the standing Russians to put a shot into the French (this range would subsequently be reduced as all felt the range was ‘out of scale’ and tactically unfeasible). Well, I guess I could be continually be shot upon or charge, so as a good French cavalry commander, I charged…to rather mixed results.

Nevertheless the boys had fun and gave good discussion on the rules.

Monday, 9 July 2018

the 9th Cuirassiers

I am still just an aim and shoot cameraman with only one setting on the camera and no inkling how or to what setting to use; so I take the opportunity to take photos during club night as the camera seems to love the lighting.

This month's 'target' is my newly painted French cuirassiers mounted singly.  Each unit is six figures with two units forming either two wings of a full regiment or two squadrons of the regiment or perhaps only sections of a single squadron, depending upon how the viewing wargamer considers the scale of the game.

Of course ALL wargame units are of a ratio much smaller than the historical formation and if 100 miniatures strong it could represent a squadron or the regiment at a 1:5 ratio.   But that many would be totally unplayable on the table; so we must scale everything back. As the perception to the level of play varies from player to player, I tend to just say units to describe formations of play in the game.

Merely because of availability, my formations tend to be two units of 6 for each.  I try in most cases to add a commander for if should the rules and need arise.  I have another cuirassier formation being 're-equipped' for action (I 'stole back' a group of cuirassiers I painted for a buddy as part of a trade and now under a touch up.  Now will have to replace them with lots of other stuff I guess, as I got hot and heavy about doing more of the French armoured horsemen!

The first of the regiments done
The commander is an officer with bicorne hat attached and with a bit of GS for the Frenchman's plumage 
The rules will have group moves with players either having a separate figure or one 'internal' to the unit, if they don't want to have/paint another.  Both methods will work.


Wednesday, 4 July 2018

Nap. Lion Rampant


The new project gaining some of my attention these days is developing “Lion Rampant” for Napoleonic cavalry action. Yes, the medieval rules!.  Cleverly titled “Hussar Rampant”, these are specifically and exclusively for the use of only cavalry during the Napoleonic Wars.  This exclusivity avoids any need for complications with the addition and interplay of artillery and infantry for what were often only mounted actions between the colourfully clad cavaliers of the era.

As ‘LIon Rampant’ is at its best when dealing with the back-and-forth swirling action of the mounted warrior, it is ideal for this interplay.  I mentioned this during a late Saturday night beer sipping conversation with a group of wargaming buddies and immediately we started with how to go about making this happen.

Obviously besides the gaining of, painting of, and use of miniatures; we need a set of rules.  I didn’t think converting LR would be a problem.  Already, many wargamers, including an article about using LR style for the use of small unit Napoleonics published in Wargames Illustrated magazine No.342, have taken this approach.  However we wanted only cavalry, make all troop types effective, have no ‘national characteristics’ so that, whichever unit the wargamer wants to command, it would be roughly equal, and easy to play in a convention setting, to be imperative.

Three of us, in separate cities and in two different countries, continue to hone the rules.  Part of this process is the play-test so I took the stat charts and did a quick solo game using WillB’s Russians and French.

Anyone who has played Lion Rampant knows that any change, for example, from 7+ or 8+, is a huge difference and must be carefully weighted and so many more tests will be required to fine tune the charts.

[random thought: is that Dan Mercey sighing?] [Nevertheless Dan, thanks for the inspiration]

But for the moment, I will just present a few photos to show the look of the game.
Using WillB's French heavies supported by his unit of hussars. Marshal Ney commands in the middle.   I must say that the flowing ranks of the miniatures look more impressive on the table than in a photograph.
the cavalry battle somewhere in Russia

we rule writers will need to determine how long will units last with combat effectiveness.....

As a group we have settled upon the Battle of Waterloo as the basis of the collecting as to keep the historical integrity of the troops used.  I already have two simple scenarios based upon real events in the battle which we could use.

Currently there are seven of us which have pledged to have units ready.  Today I was busy building the Netherlanders 4th Light (Dutch) Dragoons to add to my ready to paint British 12th LD for the Allied side.  Lots of snipping, scraping and gluing of these Perry plastics but, well, I seem to really enjoy doing it!

Saturday, 23 June 2018

Jimasa has a burning desire….


Jim suggested he had individually mounted Japanese Samurai to add to my collection for a “Lion Rampant” rules game.

These rules, while designed for the European medieval period, work well for other conflicts and convert well for early Japanese warfare ( well for tabletop wargames anyway)
The introduction of the gunpowder handgun (‘teppo’) into Japan in the early 16th century adds a weapon not within the Lion Rampant rules arsenal.  Jim declared he would rather use a bunch of bows, but I like them as Samurai killers.  But each troop type has advantages and disadvantages…as long as you can activate them!  That is the key to LR, and outcome of games as usual, will depend upon them.

The scenario has the holders of the castle running out of the castle to prevent Jim and his contingent, along with the ambushers of Kevin arriving randomly later, to systematically burn each of the fields and village buildings thus burning the castle inhabitants food source.
Jim's ashigaru burning along.  One of the banner designs he used is the same as mine and the same Kingsford Miniatures.
Jim and Kevin were having the usual LR trouble with activating, while Will and Peter were doing better, shooting up opposing teppo units “before they can shoot back!” Even the rather weak firepower from the castle wall got a couple of important hits. As Peter points out:  “Every courage test required could be a disaster”.
a teppo unit about to be attacked by irate peasants 

The game swung slowly to the castle defenders favour despite my back up plan to have a reinforcements arrive after a (d6) number of units from one side or the other were eliminated and we had a few more hours to go. Kevin’s dice rolling had the extra unit depart rather quickly unfortunately.
Jim's ashigaru vs one of Takeda samurai commanded this game by WillB. More of the Samurai's friends are just off camera.

Fighting at the village gate
I had my Peasant favourites situated in the village to attack any unit trying to burn a building.  Peasants are rather poor fighters and did little, even against a teppo unit, so fell back to their station within the village. One of Kevin’s ashigaru infantry units ignored them while torching ( well, TRYING to alight the thatch of a village building…all that was needed to do so was the unit’s  ‘move’ activation, something he was unable to do for many turns! ).  My peasants, finally rallied, had enough of this burning and went into these elite fighters.  The results were not good. The peasants were slaughtered.  And their attack on the ashigaru?  I needed sixes.  I got 6 ones! Ugg. But as was agreed by all, it was “Doug’s usual rolling”.
my usual dice rolling....... sigh ......
Fun game with the usual unpredictability.

ground eye view of the action between my collection's clans (Kingsford Miniatures)

Monday, 18 June 2018

Happy Waterloo Day!

I almost missed this celebration, one of my biggies of the year....
How could I?!
British Life Guards clash with French Cuirassiers

This most famous of battles was my early interest in wargaming, probably after viewing the movie "Waterloo" (still a great movie for the Napoleonic crowd)  My first historical book, that of the battle, is still in my library some 47 years later.  I remember discovering it, with all the pretty pictures, at a used book store but not having the money to purchase it; waiting a full week until I could get back to the store; hoping beyond hope that it would still be there during all that time. It was, thankfully.

So Happy Waterloo Day and hope your Napoleonics painting or game will be that more fun for it.


Sunday, 10 June 2018

a magic trick...

A request from Ron, had me thinking about bases.  He was starting up a new MDF company and wanted new ideas for bases.   I suggested 'petals' and 'clumps'.

Huh?

Let me explain.  When doing my Samurai army, I went to thin wood rather than card as it would be stiffer as they were carrying multiple metal figures in a spread out group

A trip to the art store Micheal's produced various circles,  ovals and a flower petal cutout which I could get numerous small circles.  I left one roughly intact for the musician/banner group
banner group on 'petal' multi-base

From any distance it looked like a group of individual stands rather than one single element. Too bad it was almost the last stand to be done or I may have altered my basing scheme from the start!

But this in mind, I suggested to Ron this petal ideas along with clumps of seemingly singles all attached to make group moves made easy.  I don't like the sabot concept and do enjoy the look of each figure as an individual; but as moving individual figures, especially stretched across a table at full extension time after time is rather tedious and sore on the back, it gives the benefits of both.

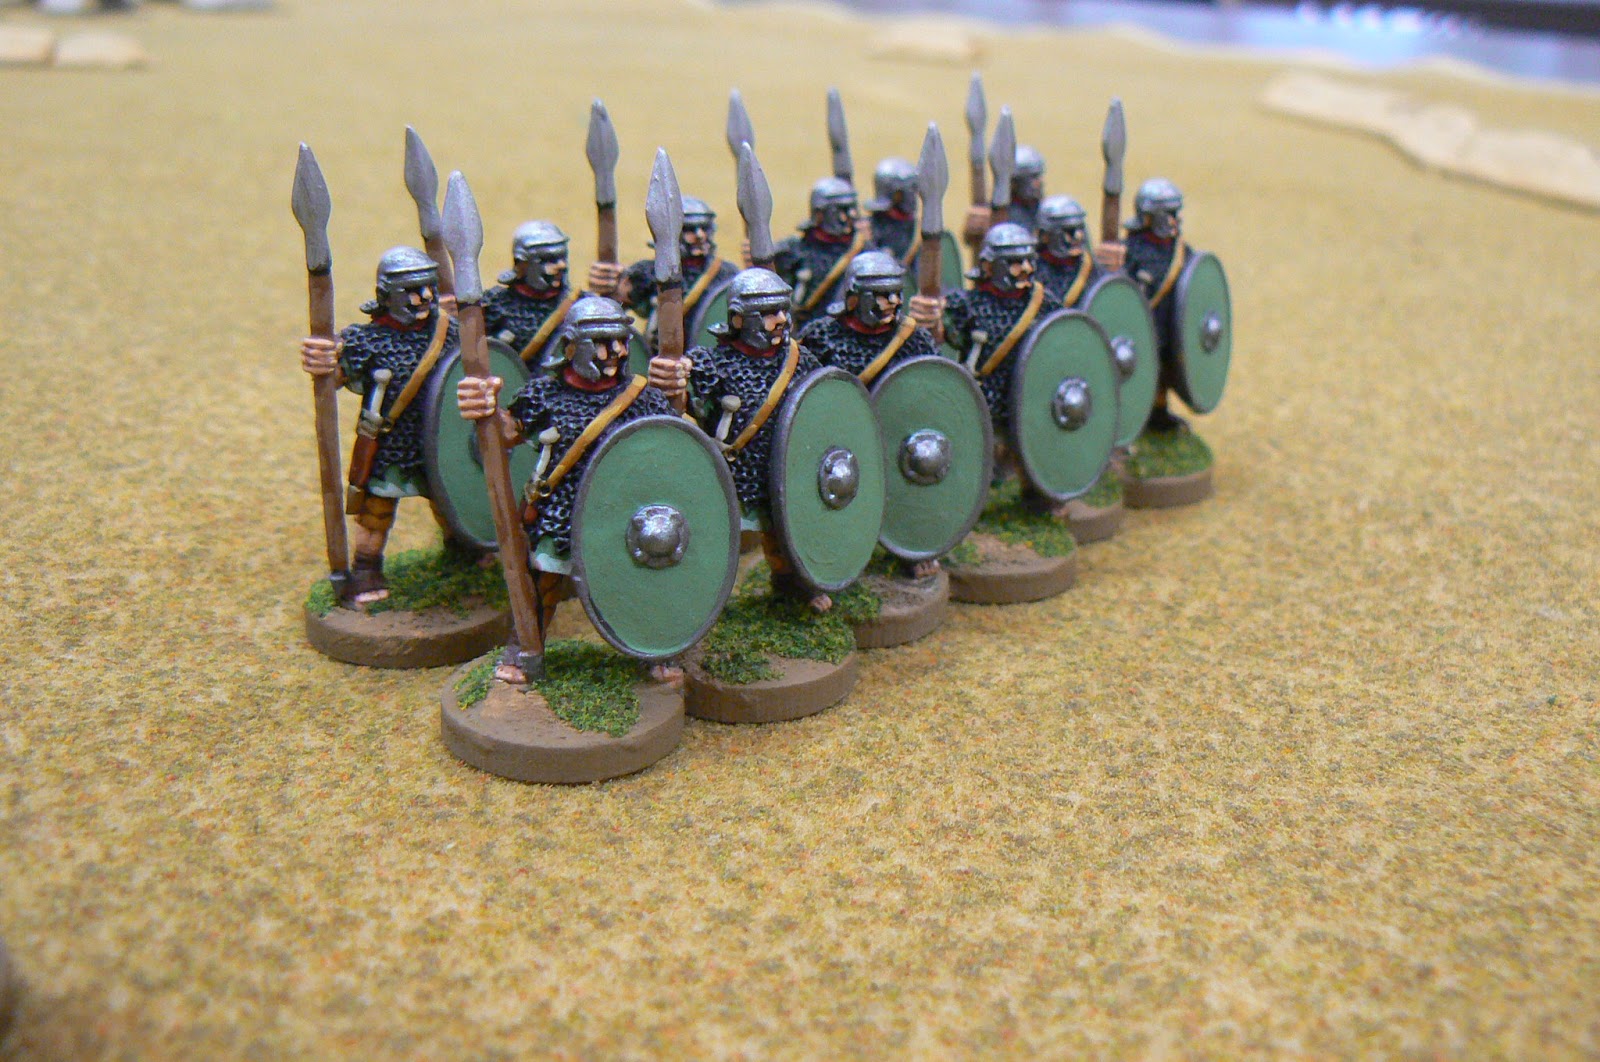
We can see this in this photo of a line of six Roman Auxilia being held, as if by magic by two digits of the hand.
the Roman Auxilia
my magic trick!
12 figures on only five stands
same rank as from the previous photo

The rest of the army is grouped in various sizes to offer any combo of casualties to the unit.  I have subsequently suggested two rank versions which again offers a look of individually based miniatures but with a group move effect.

You can see his comments on his company's blog at: https://www.3d-dzyn.com
He is going over pricing currently and hopes to start in earnest in August.  I will put in an order for more!


Saturday, 2 June 2018

It's dry in a desert: a WW1 game.

"It's Dry in a Desert"

 Hmm, that could be the title of the my new rules I tried out with the help of KevinA at the club.
( IDIAD)?

After a beer or two at home while looking at new basing techniques for my small collection of 20mm Ottoman and ANZAC troops for the desert of Sinai 1917, a concept for the basis of a home-brew rule set popped into my head,  so I produced a VERY sketchy idea which needed some help filling out. Such as....umm, how far do they move...THAT sort of thing!
Luckily Kevin was game to help me out during the club night and by the end of the evening we had a simple, convention friendly game which we both stepped back from the table, with a grin on our faces and stating "That was a fun game!"

The rules are still very rough but seemed to flow.  Lots and lots of dice.  Only sixes do anything.  Kevin and I certainly have trouble rolling sixes (twice Kevin rolled 32 x d6 dice and did not score a single 6!)  The real slow part was carefully counting out the dice for each roll!

The figures are HaT 1:72 soft plastics with a very simple paint job and highlighting wash.  The trenches are made from cheap self-hardening clay with the 'sandbags' a mere impression in the clay (a very quickly done impression...obviously....). The tents are cut from a large Toblerone chocolate triangular box, painted and glued on card.  Very old school!
I have not finalized the basing still so went really simple but actually kinda works so might stay with it!
Turkish heavy machine gun company.  Lots of dice worth of firepower. 
Australian horse attack Turkish position
Needed only NOT to roll any six to activate on two die.  I couldn't do it for five turns in a row! Thus my poor disheartened Turks continued to mill about.

Friday, 1 June 2018

"What the FLaK??!"


“Myya planna, az sa Italiano torpedo pilot, isa tooa fly straighta and low, denna turn left to the carrier. To hecka witta Brits and da flak…..”

"Iya doa datta wella, butta myya fish mustta beena duds, as Iya coulda notta throwa the required 10 onna the cueba."  Momma mia!

The flight of three Italian torpedo bombers I controlled to help take out the HMS Illustrious:


British fighters on patrol defending the British carrier in the distance:


The British fighters fly past my rear.  I manage to shoot one down and damage the other.


Coming through the flak.  As the attackers came from all directions and communicated little, it was surprising that we ended up with had multiple waves of attackers near the same point.   I am the third wave.  The first from the far side earlier had a hit on the carrier. The second attack is closer to the ship.  The forth wave is the German Stuka dive-bombers above my planes :


The attacks were ultimately unsuccessful. Either blown out of the sky or completely missing.
Good game nevertheless. Thanks to Kevin and Dave.
See their blog posts at :  link  and  link