Tuesday, 24 January 2012

a Monday Russian defence

Played another Monday night game at Francis'. The boys are learning the 'Battlefront' rules.  Each game adding a different aspect of the rules to the play.  This game was to be building/urban fighting.

The Russians were given lots of defences and pockets of built-up areas to control. The Germans to take them.  Being set in the Summer of 1941, I suppose that was logical!

The Russians had large commands, only of "trained" quality and a few poor quality tanks which stay hunkered down.  The Germans were of two commands.  As Kev, my follow commander is always late for these affairs, I set up with me being the pinning force and I gave Kev the Panzer Grenadiers with their half-tracks which had a better armor rating than the Russian tanks!

I deployed them pointed toward the corner of the Russkie and told Kev, "You are the Schwerepunt, hit them hard."  Of course then, he then took them the long way around the table edge, taking up valuable time, while I got pounded.  The PzGr. never got into serious action and my attacks peetered out.
a Russian BT2 blowed up real good! (the boys have many of their tanks without turrets glued down in order that they can be removed (blown off to the side) and the flame marker placed.  Boom, boom.

The most interesting action was the surprise attack by a bunch of Russian cavalry who charged at my panzers on the flank.  They had me surrounded but only a round of close combat saw them off.  First time the horsey boys saw tabletop battle apparently. 
The Russian cavalry dulling their swords against good German steel!  [Hans a tank driver asks of his loader, do you hear hoof beats? Was? Nein, Claus, it is that damned third piston making a sound again.  No, Hans, I distinctly hear clopping!]

Thursday, 19 January 2012

The colours of the 49th Foot-- part 2

Spending too much time on YouTube, I discovered this video of the reenactors of the 49th regiment.  Note the color, the 'sea green' or teal of the regimental flag.
I am still amazed I got it correct.  Was it that in the back of my mind remembered a reference and thus just grabbed for the right paint container or just got crazy lucky and, on a whim, used the correct paint shade?!  We shall never know ;-)

Sunday, 15 January 2012

Miniatures Review: Brigade Games' British Naval Landing Party (Napoleonic era)

I recently purchased Brigade Games "British Royal Naval Landing Party"
They are to be yet another unit in my growing War of 1812 collection.  Sailors participated in land actions at Fort Erie on the Niagara and the battles and actions along the Chesapeake Bay and other raids along the American seaboard.
most of the poses have firearms


These are pictured on Brigade Games' web store so no surprises when received.  In very timely fashion I will add. I really like the models, well sculpted faces, natural cloth folds with even the seams are indicated! There is only three packs of 4 in each within the range, with additional 2 figure command pack, so large numbers of troops will have duplicates but thankfully not the 4x2 poses in a pack some other manufactures do (ugh) so there is a great range of poses. Most have the tophat, short jackets and pantaloons (trousers) fashionable for land actions rather than for on board actions.
 As you can see, they are in the same scale/size as (left to right) Perry, Old Glory, Victrix, Foundry, and Brigade Games boys in question. {the Perry is a plastic casualty- I don't have an available figure- but is positioned to show sizing which is good with the others}
A close up.  Directly out of the package without clean-up.  This one seems to be the poorest of the castings.  Still, it is not bad considering the magnification of the photo. With my painting of multi layers of thick paint, the minor faults will not be evident :-)


Again, it is directly out of the package.  Note the seams shown on the jacket!
Would a one-armed sailor still be in the service?  Nevertheless a nicely sculpted figure.


Highly recommended.

Thursday, 12 January 2012

Jacobite Battles

I brought out my box of 15mm Jacobite armies. It has been years since I had opened it. Sigh...  On the box label I printed "complete".  Hmm. Well it turned out to be.  It had the complete armies (the correct British regiments for Prestonpans and those Jacobite units for Culloden.)  I had notes how to organize the units, individual battle scenarios and even terrain, simple as that is, with cloth bogs and a couple of walls.  The rules had copies for the players and I had the opportunity to spring it upon Francis and Brandon.  The former, the owner of the local Imperial Hobbies store; the latter his kid and "soaker up of rules".

So we started by playing the Battle of Falkirk.  If one is familar with the 1745/46 campaigns, one will know it is not a victory by the British.  The rules are that of my own creation and are based on a 'pip system' much like DBA but all actions by units require pips which are allocated to the player - and usually not enough should the player's opinions be expressed!  However that is the command element and makes the player think about things, what!

I will not bore you with  the details but the British did lose that game.

We had time for another, so I set up the Battle of Culloden.  To recreate the better performance by the British infantry, I increased their class from 'B' to 'A' with the result that indeed the Highland charges were defeated.
bird's eye view of the initial deployments for the Battle of Culloden.  I only use the first line of British regiments; the Highlanders have a hard enough time of it already!
While the terms of victory conditions were basically a percentage of losses; for Culloden, the appearance of Bonnie Prince Charlie and the poor command by the Jacobites had the scenario give only command bonus if Charlie was attached to a unit.  However, if BPC was killed (a General attached to a unit must roll to see if he falls for each DP (hit point as it were) taken.  Automatic loss for the Highlanders should he be killed (really, what would be the point of continuing the struggle for the dynasty otherwise, eh?) Well, you know it, moving up with the Ecossais Regiment, it took hits and Brandon rolled the infamous one on the d6.
the death of Bonnie Prince Charlie

A good night, the rules withstood two new players to them without any changes (!) I guess I can put the Jacobite box away for another four years or so. Another big sigh.

Please be kind-hearted about the quality of the painting.  It was done many years ago while I was having very bad back problems.  I was eating prescription painkillers like they were peanuts and the only position I was ever comfortable was on my stomach on the floor with my right leg in a very odd angle.  Thus positioned, I propped myself on my elbows and could paint these armies. Needless to say, once posed I was loath to move and so could spend the necessary hours painting lace and tartans. 
The 44th Foot with those damned cast-on flags (Hallmark? 15mm)

The bases were sized with another rule set in mind and the storage containers I have and so are designed thus.  
A 'regiment' of Highlanders. I believe these to be again Hallmark Miniatures (15mm)

Wednesday, 11 January 2012

The colours of the 49th Foot

It was one of those "wow, how unbelievable is that!" kinda deals.

I was paddling through the internet and found this blog page from Brock University.  Yes, it is named for the War of 1812 General who "saved Canada" during the opening months of the war before meeting a heroic death beating off yet another American attack.  Because it is Brock University, it is full on the bicentennial thing and was given a pair of regimental colours fully embroidered and all. See:
Brock-News

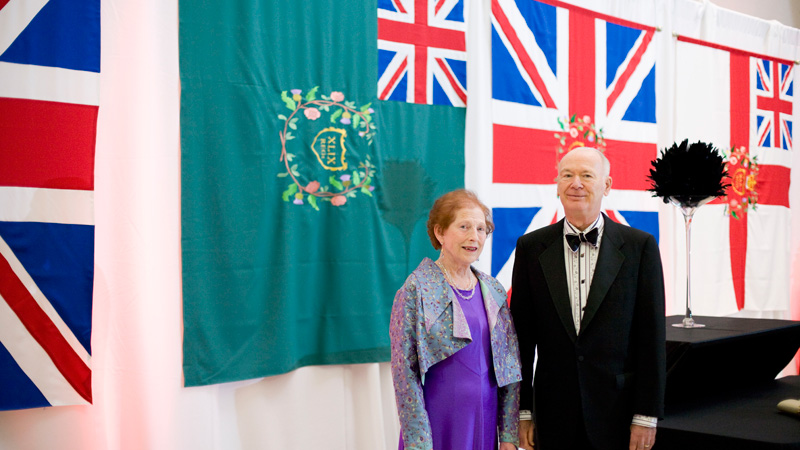
Now what is really amazing is the color of the, well, 49th's regimental colour (flag).  You see, I had not seen this article before.  When painting the flag, I simply decided to use a green color which I had not used much and thought it would be distinctive.  I mean I really did not find any other references to the exact color and so could, in effect "fake it" without much comment from any "experts" in the crowd.

Then I find that this donated recreated flag has been made in almost the exact shade as what color I had previously selected! (the shade of my photo above is slightly lighter than actual).  Thus I can back up the use of this odd-ish shade of green.  Ta-da!

[The figures, if you have not seen my previous posts, are Old Glory but with a covering of green-stuff modelling epoxy to indicate the wearing of their overcoats by the 49th during the historical Battle of Crysler's Farm in 1813.  Only the color party is photographed.  The complete wargame unit is some 7 stand (28 figures) strong.]

Saturday, 7 January 2012

War of 1812 "Guide Books" review


War of 1812 Guide Books review
I purchased these War of 1812 Wargamer Guide books from On Military Matters recently. They are published by them (c.1997) ISBN 1-900688-30-1

Two books in the series : The King's Army by Charles Glenn and Stephen Manley; and The American Army by Richard V. Barbuto.

Both are about 30 pages long, printed in an old photocopy style. I did not get much additional information from these than what I have achieved from other sources (notably from Chartrand's excellent book on the American forces recently republished and amended with some new color plates)
The British army is that of the Napoleonic wars with the same uniforms and regulations (with only some special units which were local or brought in only for the American campaign (the West Indies regiments at New Orleans, for example) So if you study the British and have the Osprey books on the topic or access the Company of Military Historians, you pretty well have all the necessary information to have it correct. 


I noticed some notes on several units which I found interesting or did not know of, but would like to confirm with other sources. But with the vulgarities of supply during that era, the collector has much “wiggle room” to justify use of older uniforms, unique costumes or mixture thereof. The authors also seem to use this concept in many of their assumptions. True enough.

At $12 per (with shipping extra) I don't know if they are good value. Good to have on the shelve perhaps; if you loan it out it is not invaluable, however. Found it interesting that each book would have a full page index for only <30 pages!

If you need any specific unit uniform information please feel free to contact me.

Wednesday, 4 January 2012

"Battle of Raymond" part 4


Battle of Raymond – end game


The battle took a lull in the action. Not one unit would move or fired. This was, in large part due to the inactivity by the Americans. While the British commander was content to continue to have his units stand in place. “My dear major, why would I need to reposition? I will not run around like a wet hen, by God!”

And in truth, he did not need to. However he did order the 100th Foot to support the guns on the Right (the colonel apparently misinterpreted the order and caused some confusion in the ranks with confusing formation calls to the ranks-- I rolled a one for command (but with being well-trained troops over came this impediment only to have me roll double ones for movement, and with a fence or two in the way, this caused much confusion) and thus more poor to no movement. Not worried, the British General harumphed, noted to his aide to reprimand the poor colonel and turned back to see the American forces not move.

This lack of movement was due to the poor quality of the American regiments on the right flank. Any of the American regulars in the early war round felt shako [my Sixteenth, Seventeeth and Twenty-Eighth Infantry regiments] I give this lack of quality to reflect the American army early war historical efforts. Unfair to be sure but makes remembering who is what, much easier.
16th Inf Regt (early war uniform)  The square marker with small ball-bearings for 'cannon balls' is used to note disorder to a unit.  It shows '4' which is disordered indeed.  The marker can be readily seen but is discrete enough to not ruin 'the look' of the table

While the American regular army regiments tried to redress or to advance, the NY Militia who did advance too far was ordered to the rear and, well, willing accepted the order moved rapidly to safely. (bloody double sixes again!!)

Meanwhile in the American center, The Twenty-First and Twenty-Third Infantry regiments finally arrived, however with the defeated Kentucky militia now looting the baggage of the regulars (!) had the Twenty-Third ordered to stop this action. The Twenty-First was held in reserve (as it was not moving anyway!) The rifles, now reformed, were ordered to the left flank to hold the position. The American artillery continued what was to prove only desultory fire upon the British line which was protected by the stone wall.
the Twenty-Third Inf Regt moving to protect the baggage train
a view behind the American position with the artillery deployed (lower right) and the Rifles redeploying to the left.  In the distance, the British right flank.


Position of the 8th Foot having driven away the American attack.  The Canadian Fencible skirmishers on the left of the line

The last American attack was alone made by the Twenty-Eighth Infantry which finally crossed the muddy and tangled stream to emerge from the far woods only to be met with devastating fire from the 8th Foot who wheeled smartly to meet this threat. “My God men, well done!”, exclaimed it's colonel (3 sixes from only 6 dice!) The Twenty-Eighth thus melted back into the woods and the now totally disordered unit routed back to safety.
"Look me Lord, another unsupported Jonathan attack!"

The American General, with few good resources remaining, concluded the day was done. The British commander however did not choose to counter attack as the same terrain restrictions which hampered the Americans would face him. "Call it a day and back to our brandy, what!"
British artillery park

Saturday, 31 December 2011

Year's End Reflection


The time for contemplation....again, The wargaming year in review for 2011

I guess with the new year, it is natural to look upon the past 12 months to see if all those promises, desires and wargaming pleasures have been fulfilled. Hmmm.

On the plus side I have good health. Except for somewhat poorer eyesight. Age, I guess.
On the negative, I don't game as much as I would like. I mostly solo to be honest. I have a big table but not time to culture a gaming group. I think I was too late for “I own a large table and big room. Come and we can use it.” Too many of the older guys already have them set up and a regular group.

However with age and within the hobby for over 30 years, I have collected huge numbers of figures and big armies. I rarely can have a game with any more than twice a decade it would seem. Not only that, I have about half in 15mm and the other half in 28mm not counting the various other naval, air and miscellaneous periods and 'projects' I have dabbled in. It is nice to see all the stuff I have painted yet extremely frustrating that I can not use them on a regular basis. Loving it all and much time passing gathering up the pewter has conspired to put me in this spot. However selling any of it is, at this stage, unthinkable.

But, of course, I still collect more. I have not gone to totally zero buy mode, but I have moderated the purchasing to very few. I still love the thrill of getting the package in the mail. Like a kid at Christmas. Silly for an old guy, but there you go.
I have been trading a little bit lately however, trading stuff I will NEVER get to, for stuff I may LIKELY. While the mail costs are there, the trades are fair and both sides benefit. Another man's junk is your treasure as it were. Thus I am consolidating many of the 'projects' . They are bigger, but less of them.

So what are these “projects”? Well, the War of 1812 continues to capture my attention. Just bought some sailors for additional land actions. Let's see: 2 big US regiments, 3 British, sailors; say 180 or so to go - so far , but that is expected to grow.
Then the SYW with Hessian, Brunswick and Hanoverian forces [near 900 in total]. These are done but to fight them is the French; primered and waiting in boxes (for 14 years!) to be painted. 17 battalions of 12 , with 16 squadrons of 4 cavalry. Do the math yourself...I don't want to scare myself. [Artillery already done however, whoo hoo] . I have a special imagi-nation collection which is growing but not getting painted. The French in America AWI at Savannah force only half done and not ready yet. And smaller (ahem) collections for DBA style games perhaps which have not been out of the blisters yet. (sigh) Oh , I forgot my c.1690 collection. It is big also. Needs some more cavalry though (sigh, again). And I have many more interests but you get the idea.
only some of the boxes full of my painted 28mm


That was only the 28mms. For my 15mm, I have a large Zulu type contingent to paint; many more DBA armies; and some extra units to a large ACW Fire and Fury force, both North and South which has not been used for a couple of years. Did I mention my 1859 armies? Both painted collections are over 1,200 strong.
...and yes, only some of the containers full of my painted 15mm armies


Do we think the man with 40 fast, expensive cars in his driveway with only the ability to drive only one at a time, a silly person?

Anyway, I will putter away at getting some of this done, and played with, during this new year. I will not promise anything more. Doesn't hold long anyway........

Friday, 30 December 2011

"Battle of Raymond" part 3

This is the continuing narration of my fictional War of 1812 battle I am playing albeit sporadically.
As we left the scene last, the remainder of the Kentucky militia full of piss and vinegar (read: bourbon whiskey!) before the British artillery delivered deadly canister fire, fell back and upon further reflection decided they had enough fighting for one day and promptly routed (militia with too many Disorder markers and no courageous leader to over come any, even moderate, dice rolls)
The American center with the routing Kentuckians, the American General (left) and the 21st Infantry moving up (bottom right)

The 44th Infantry decimated, also routed leaving its wounded colonel to be captured by the British. It may have been a "well, he wanted to be the THAT position so he can darn well stay there! I am not staying to help and get shot" attitude by his troops. Their rout also had the US Rifles who were supporting them also run and so no troops remained on the British side of the stream.

Meanwhile on the American right flank, the fast moving NY Regiment of Militia marched in good formation in column right up to the British skirmishers holding the ford and started taking fire. The politician colonel who believed a heroic military career will launch his political aspirations perhaps even to the Presidency (hell, it usual works in American politics, don't it?!) almost took a bullet (one pip from being wounded!) and froze. [note: more precisely me, as I could not decide the units course of action and so transferred this indecisiveness to this poor colonel]  The command roll was good however and the regiment merely halted in good order.  Nevertheless the Brigadier General raging at the colonel's impetuous march that would have the militia before the regulars and not supporting them.  (the rules have all militia move their entire distance - how did I know I would roll double sixes in successive turns!)   He sent his aide to bring them back but apparently the aide's horse must have stumbled in rabbit holes as he moved only 4 inches with 3d6! [I seem to rolling hot then cold a lot in this game]
The New York Regiment of Militia. [*see uniform info below]    To the left of the NY boys is my 16th Regiment in their early war black faced red uniform with gray trousers.  Sated my desire to paint Prussian Napoleonic troops you understand!

In the center, the Army General tried to bring order to the routing Kentucky militia and in spite of his lack of command dice help, meanwhile the well-trained American artillery batteries were unlimbered near the bridge in a small 'grand battery' ready to bring fire upon the British defensive line; and the 21st and 23rd Infantry finally started arriving.

The day was not lost, and in fact only beginning, an aide reminded him.
American artillery ready to fire {Old Glory early war artillery men with Front Rank (?) French gun models. Oversized by a bit, but I love the bulk of them.  Limbers are old Connoisseur British ones I believe.}


--------------------------------------
[*Apparently the early regulation uniform of the State Infantry was similar to the First Issue of the Federal regulars but differed in having a brass rather than white metal shako plate and red over white plumes.  The coatee had red turnbacks and the backpack was painted black not light blue. I painted the pantaloons grey. The flag is a NY militia flag captured in the historical battle of Queenston Heights in 1812.]

Saturday, 24 December 2011

"Battle of Raymond" part 2

I played out a couple of turns of this solo fictional battle using my own rules which I have described earlier.  I think they really reflect the chaos of battle, the lack of motivation by troops once engaged or even disorganized by terrain, shell or lack of training.  Only the best of troops have any chance of success.
While I am perhaps odd in the wargaming field to have no qualms about spending hours painting figures of militia who will stand little chance of glory on the tabletop, I understand it would be little fun to most wargamers who are, well, gamers, and want some chance of success and most rules allow for.  Me? Well, I think it realistic for units to up and run away with only a few shots their way.  Happened all the time in historic battles.  I enjoy writing up the history of a fictional battle and noting all the events.  Which leads me back to the topic at hand.

While the set up is a scenario for an American Civil War battle (great for War of 1812 by the way, the small affairs as mostly regimental in size, with very little cavalry for the most part) the actions of the units are up to "the chart" and the dice with some interesting results

The photo shows the early events of the engagement
To the left the main British line behind a stone wall ready to fire upon the US 44th Inf. Regt. crossing the bridge (center of the photo) who are chasing the Upper Canadian Lincoln Militia who were posted at the bridge but were forced back by the US 1st Rifles (seen fording the stream to the north of the bridge).

To the upper left of the photo, the British 8th Foot Regt. awaits the American flanking movement whose regiments are seen on the top of the photo. The American guns were way back in the advance and are still moving into position (center right).

Finally the Kentucky militia are seen at the lower right of the photo, charging in mass, across the stream toward the British battery represented by one gun. (*note that artillery was sparse in the War of 1812 and in the largest of campaigns, Niagara 1814, both sides only used half-batteries of 2 or 3 guns as tactical elements)

Kentucky volunteers led by its civilian dressed colonel.  Knuckleduster "Frontier Militia, advancing" with the colonel a heavily converted Old Glory "Pres. Madison".    Painted and converted by me

The Kentucky boys must have been encouraged by much Bourbon whiskey {I rolled lots of 6's for their maneuver!} as they chanced a direct charge {I again rolled double 6's and according to the rules, militia MUST move the entire distance} to the guns.  The first regiment was shot to heck and the others fell back quickly.  "I's saw the boys in front get felled down like corn stalks and I sobered up real quick like", said one survivor.


While this disaster was afflicting the American left, and the regiments of the right were not yet in position to advance upon the defended ford, the Colonel of the yet unsupported 44th Regt., perhaps to prove the martial spirit of his unit {yes, you guessed again, yet another 6 rolled...I have never thrown so many in my life I can assure you!} ...and with the pluses of being regulars with no disorder or hits, the large maneuver number and indeed the necessity of getting to the other side of the stream, made up the Colonel's mind.  It proved folly as "the most beautifully conducted fire I had witnessed" completely destroyed the unit in minutes. Again I rolled a 6 --- for hits which produce DPs; get enough and casualties happen --- every second dice!  With the British veteran 1st Foot and the Upper Canadian militia assisting well, the ground was covered in the bodies of the 44th and it's colonel wounded.

The British line held and the initial American attacks were handedly destroyed.  Will the American commander attempt more attacks, await his reinforcements all the while the day grows shorter, or call off the bloodshed?  Stay tuned.

I conclude with another picture of the Perry British limber team. Very nice model. 

and the British 100th Regiment of Foot in reserve.  The pant color in the photo appears bluish but they are painted mid-gray I can assure you.  They are led by a mounted Victrix colonel.  Slightly proportionally smaller than the Old Glory rank and file he leads and no doubt well matched to the latest Perry work , it is a very nice model and I think one of the finer sculpted horses on the market.

Sunday, 18 December 2011

My table filled again

the grand advance of the American forces
For many days my wargaming table was left clear of all terrain and figures.  It seemed very empty and I felt it psychologically.  Of course I did have more pressing items to do but I really did need to fill it.  While my interest wondered to doing a large DBA Zulu battle using 15mms (which I haven't finished painting yet - another time to tell that story), I really did not have the need to place on the table another of my interests so the War of 1812 again occupied the spotlight.

In this case, a ACW scenario by Paul Stephenson for the Battle of Raymond found in an old wargaming magazine (bathroom reading) was the catalyst for the fictional encounter.  I will play it out over the next few weeks. The following are a few pictures (albeit poor) of the game.

The British 8th Foot with the officer trying to read the General's ADC's handwriting...
The U.S. 28th (foreground) and 17th Inf. Regts. moving to the ford on right flank
This engagement is the initiation of the new American limber team. It is modified from the Perry British team (I removed one set of horses/rider to make 3 rather than two teams-otherwise too large in scale for the tabletop I feel).  I removed the British heads and replaced with American ones and trimmed a bit of lace.  Perhaps the Americans would not have the swords but no doubt the regulations would have them, so... The limber is French, the Americans using their model.
the Perry British version (sans one set of horses/rider)
The main British defensive line


  I have the next two weeks off for the holiday break but really intend to work hard in getting lots of painting in for a few fellow wargamers whose work is much over due.  I might just try to get some of my pile done too!

Wednesday, 7 December 2011

the Monday WW2 game

Chris Oakley was kind enough to forward a compilation picture of the WW2 game held on Monday night in honor of Dave's birthday [not that he will ever grow up but that is another matter! ;-) ]  It was a quick think scenario of 'flag' in which both the Russians and Germans {early war} were trying for each others supply depots.  Both tried a left flank charge and a right flank hold with a result of a big tank fight in the middle. Both armored forces were destroyed as were the assaults.  A draw.  Some of the 15mm figures were painted by me years ago and are in the collection of Francis Monroe of the FLGS Imperial Hobbies, who hosted the game.  
Note: the Russian "land yacht" is some early war monstrosity. Yup, the Germans took it out too!

Friday, 2 December 2011

Wednesday, 23 November 2011

My "Grand Alliance/1690ish" collection

I actually do have other collections than my War of 1812 stuff. Actually many more.  That is what happens when you have been at it for more than 30 years and love all eras of human conflict , have the crow's love of shiny new things, and have the attention span of a ferret.

I cleaned off the table of the terrain I set up for the previous War of 1812 fictional battles I played and decided to lay out my Grand Alliance/1690ish collection for a, well, grand review.  This collection started small but expanded (as all my collections tend to do)

It began as "the other side" for a friend's Highlander's force to do the historical Battle of Killiekrankie 1689.  This we did at the local convention. I based them as he did and continued, as it looked good. However I had more of the figures left over and thought to do the Battle of Sedgemoor of Monmouth's Rebellion of the same year - having many 'rebel' looking extras and all.  Then Mark Allen came out with a very nice series in Wargames Illustrated about James's Irish army and some other figures I had  from a club's failed pirate game were repainted to become non-red clad British units of the Glorious Rebellion and thus were added in William III's Irish campaign and ....well you get the picture.  It is a very diverse collection.

So here it is in picture:
The "Irish" horse of James' army in Ireland (back to front): James' Horse Guards; Lord Galmoy's; Sarfield's


James' Irish infantry ( below:clockwise from left top): Louth's; Grand Lord Prior's; Lord Bellew's; Antrim; Irish Guards; O'Neill's  [all figures are Dixon's]
The Monmouth Rebels (also will be used as poorly equipped Irish) This picture shows the three "regiments" of Monmouth's Rebellion fighting at Sedgemoor. The Blue (top), Green and Red Regiments respectfully.  In truth perhaps not even colored flags distinguished these formations historically.  Certainly nothing does in mine!


The British foot regiments of Sedgemoor (front to rear): Trelawney's "Queen's Consorts"; Kirke's "Queen's Dowager's"; Dumbarton's "Royal Scots"; The Foot Guards; The Coldstream Guards; Scots Fusiliers(they did not fight at Sedgemoor) 

Three units of the Dutch-Scots Brigade which fought (and ran!) at Killiekrankie: Balfours'(top); Ramsey's; and Mackay's. I painted them in a different shade of red than my usual for the British as they were paid by the Dutch.  Many of the Dutch became British again under the Dutch, now British monarch, William.  You will have to read up on the era yourself as the politics of this era is really hard to explain! 


William III's Infantry (from left bottom clockwise): William's Dutch Foot Guards (note: flag is incorrect and as it is but the only Dutch unit in my collection it might well get repainted!). Continuing up from the left: the white coated Huguenot* regiments of Metoniere and DuCambon, Tiffin's Regt (later the 27th Foot) [in the upper right of the photo]; Luttrell's (later the 19th Foot) and [lower right] Earl of Bath's Regt (later the 10th Foot).  These latter two are in their earlier un-red uniforms of the Glorious Revolution and may(?) be have been in red by the time of the Irish War. [*The Huguenot's were French fighting against Louis XIV reign and were in Dutch employ fighting in Ireland for the British...don't you just love the politics of this era!!]